Complete Mountain Bike Suspension Guide: Explaining Basic Concepts and Adjustments
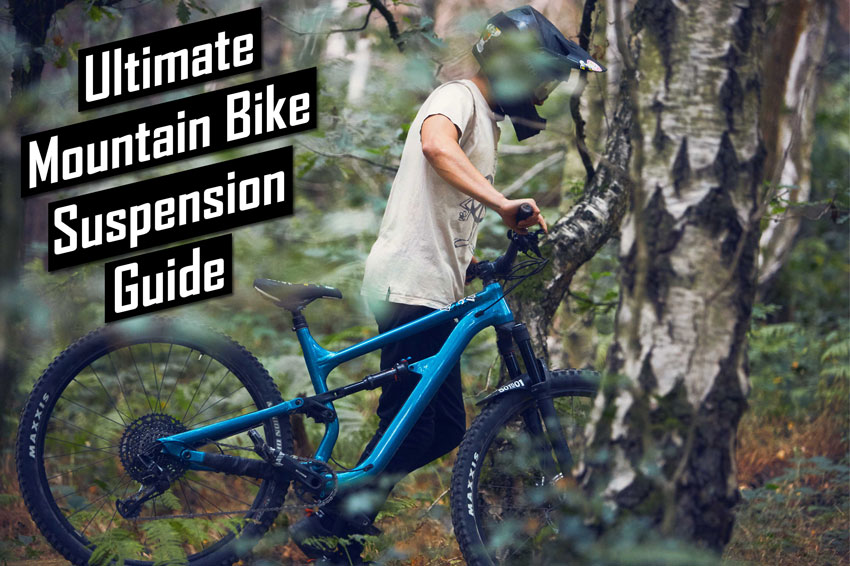
Image source: cannondale.com
Bike suspension is one of the most complicated topics in cycling. It would take a university degree to understand all the details of how suspension works, how the individual components interact, and how each adjustment impacts performance.
This article isn’t going to provide you with the level of detail. However, we will cover the basics of how mountain bike suspension works, the terminology used to describe the systems, the different types of rear suspension platforms, and a quick guide to setting up your fork and rear shock.
So if you know very little about mountain bike suspension but want to understand all the basics, you’re in the right place!
Overview of MTB Suspension and Terminology
Before diving into mountain bike suspension in more detail, it’s helpful to understand how suspension works and go over some important terminology.
How Does Mountain Bike Suspension Work?
Mountain bike suspension uses shocks that allow the wheels to move up and down a predetermined path. This movement absorbs bumps to help keep the tires in contact with the ground for better traction and control and reduces the impact on the rider, increasing comfort.
All MTB suspension has a spring (air or coil) and a damper. The spring provides resistance to the wheel’s movement when it hits an obstacle (compression) and the energy to move back down after compressing (rebound).
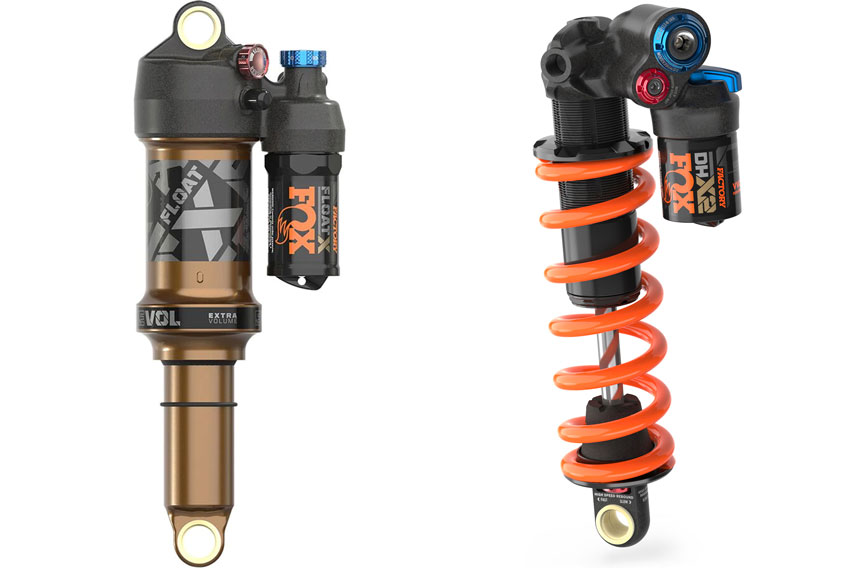
Fox Float X Factory air shock (left) and Fox DHX2 Trunnion coil rear shock (right).
The damper is a mechanism in the fork stanchion or shock body that regulates compression and rebound speeds. Modern mountain bike forks and shocks allow you to control each one independently.
Overall, suspension design balances the absorption of impacts, the effect of braking forces, and pedaling efficiency to create a system that best serves a bike’s intended use. This interplay is particularly relevant for full-suspension bikes.
Suspension Terminology
- Bottom-out – Refers to the shock or fork reaching the limit of its travel. A fork should only bottom out occasionally. Regularly bottoming out means it’s set too soft; never bottoming out means it’s too firm.
- Compression damping – Controls the rate of compression when the shock is under load. More damping gives the fork a firmer feel.
- Lockout – This lever significantly reduces compression or stops it completely. Use it to improve pedaling efficiency for climbs or pavement.
- Linear compression rate – Resistance to compression increases at a steady rate throughout the entire travel.
- Progressive compression rate – Resistance to compression increases at a varied rate, with less resistance at the beginning of the stroke and more resistance at the end.
- Preload – Pre-compressing the spring with a ring so that more force is required to begin compressing the suspension, making it stiffer. The equivalent of increasing air pressure in air suspension.
- Rebound damping – This resistance controls how quickly the suspension returns to its original position after compression.
- Sag – The distance the suspension moves into its travel under the rider’s weight while stationary.
Coil vs. Air Springs
Coil spring suspension is the older of the two designs. Steel coils have linear compression rates (see above) and are available with different resistance levels, typically matched to the frame size and the average rider weight in that height range. If your suspension is still too soft or firm after making the appropriate adjustments, you can replace your spring with a softer or firmer one.
An air spring is a pressurized air chamber. By changing the internal pressure using a shock pump, you can change the characteristics of the spring. Air springs have progressive compression rates, are lighter, and are more tunable than coils.
Guide to Mountain Bike Forks
There are two kinds of suspension mountain bikes: hardtails and full-suspension MTBs.
Mountain bike forks are highly variable and adjustable to suit different riding styles and riders. In contrast, hybrid forks offer minimal impact absorption with little-to-no adjustment capability.
Suspension Fork Parts and Terminology
This section will cover the most important fork-specific terminology and the individual components that make up the fork. Forks work in a telescopic motion, wherein the stanchions drop into the lowers when under load.

Image credit: TheProsCloset.com
- Crown – Connects the two stanchions to each other and the steerer tube. Moreover, 200mm-travel forks on some of the best downhill bikes have a dual-crown design to increase stiffness for the extreme demands of this discipline.
- Front travel – Front travel is the distance the wheel moves when the fork reaches full compression. Wheel travel and fork travel are equal.
- Lowers – The outer tubes into which the stanchions slide. The lowers connect to the wheel via the axle.
- Stanchions – These tubes connect to the headset via the steerer and consist of an air chamber or coil spring and damper mechanism.
- Steerer – Connects the fork uppers to the frame’s headset.
Types of Fork Suspension
There are two types of fork currently on the market, the standard double-prong design shown in the diagram above and a single-prong used by Cannondale.
Cannondale’s proprietary ‘Lefty’ fork has a single left-sided stanchion. It provides the same basic functionality as a standard fork but weighs less.
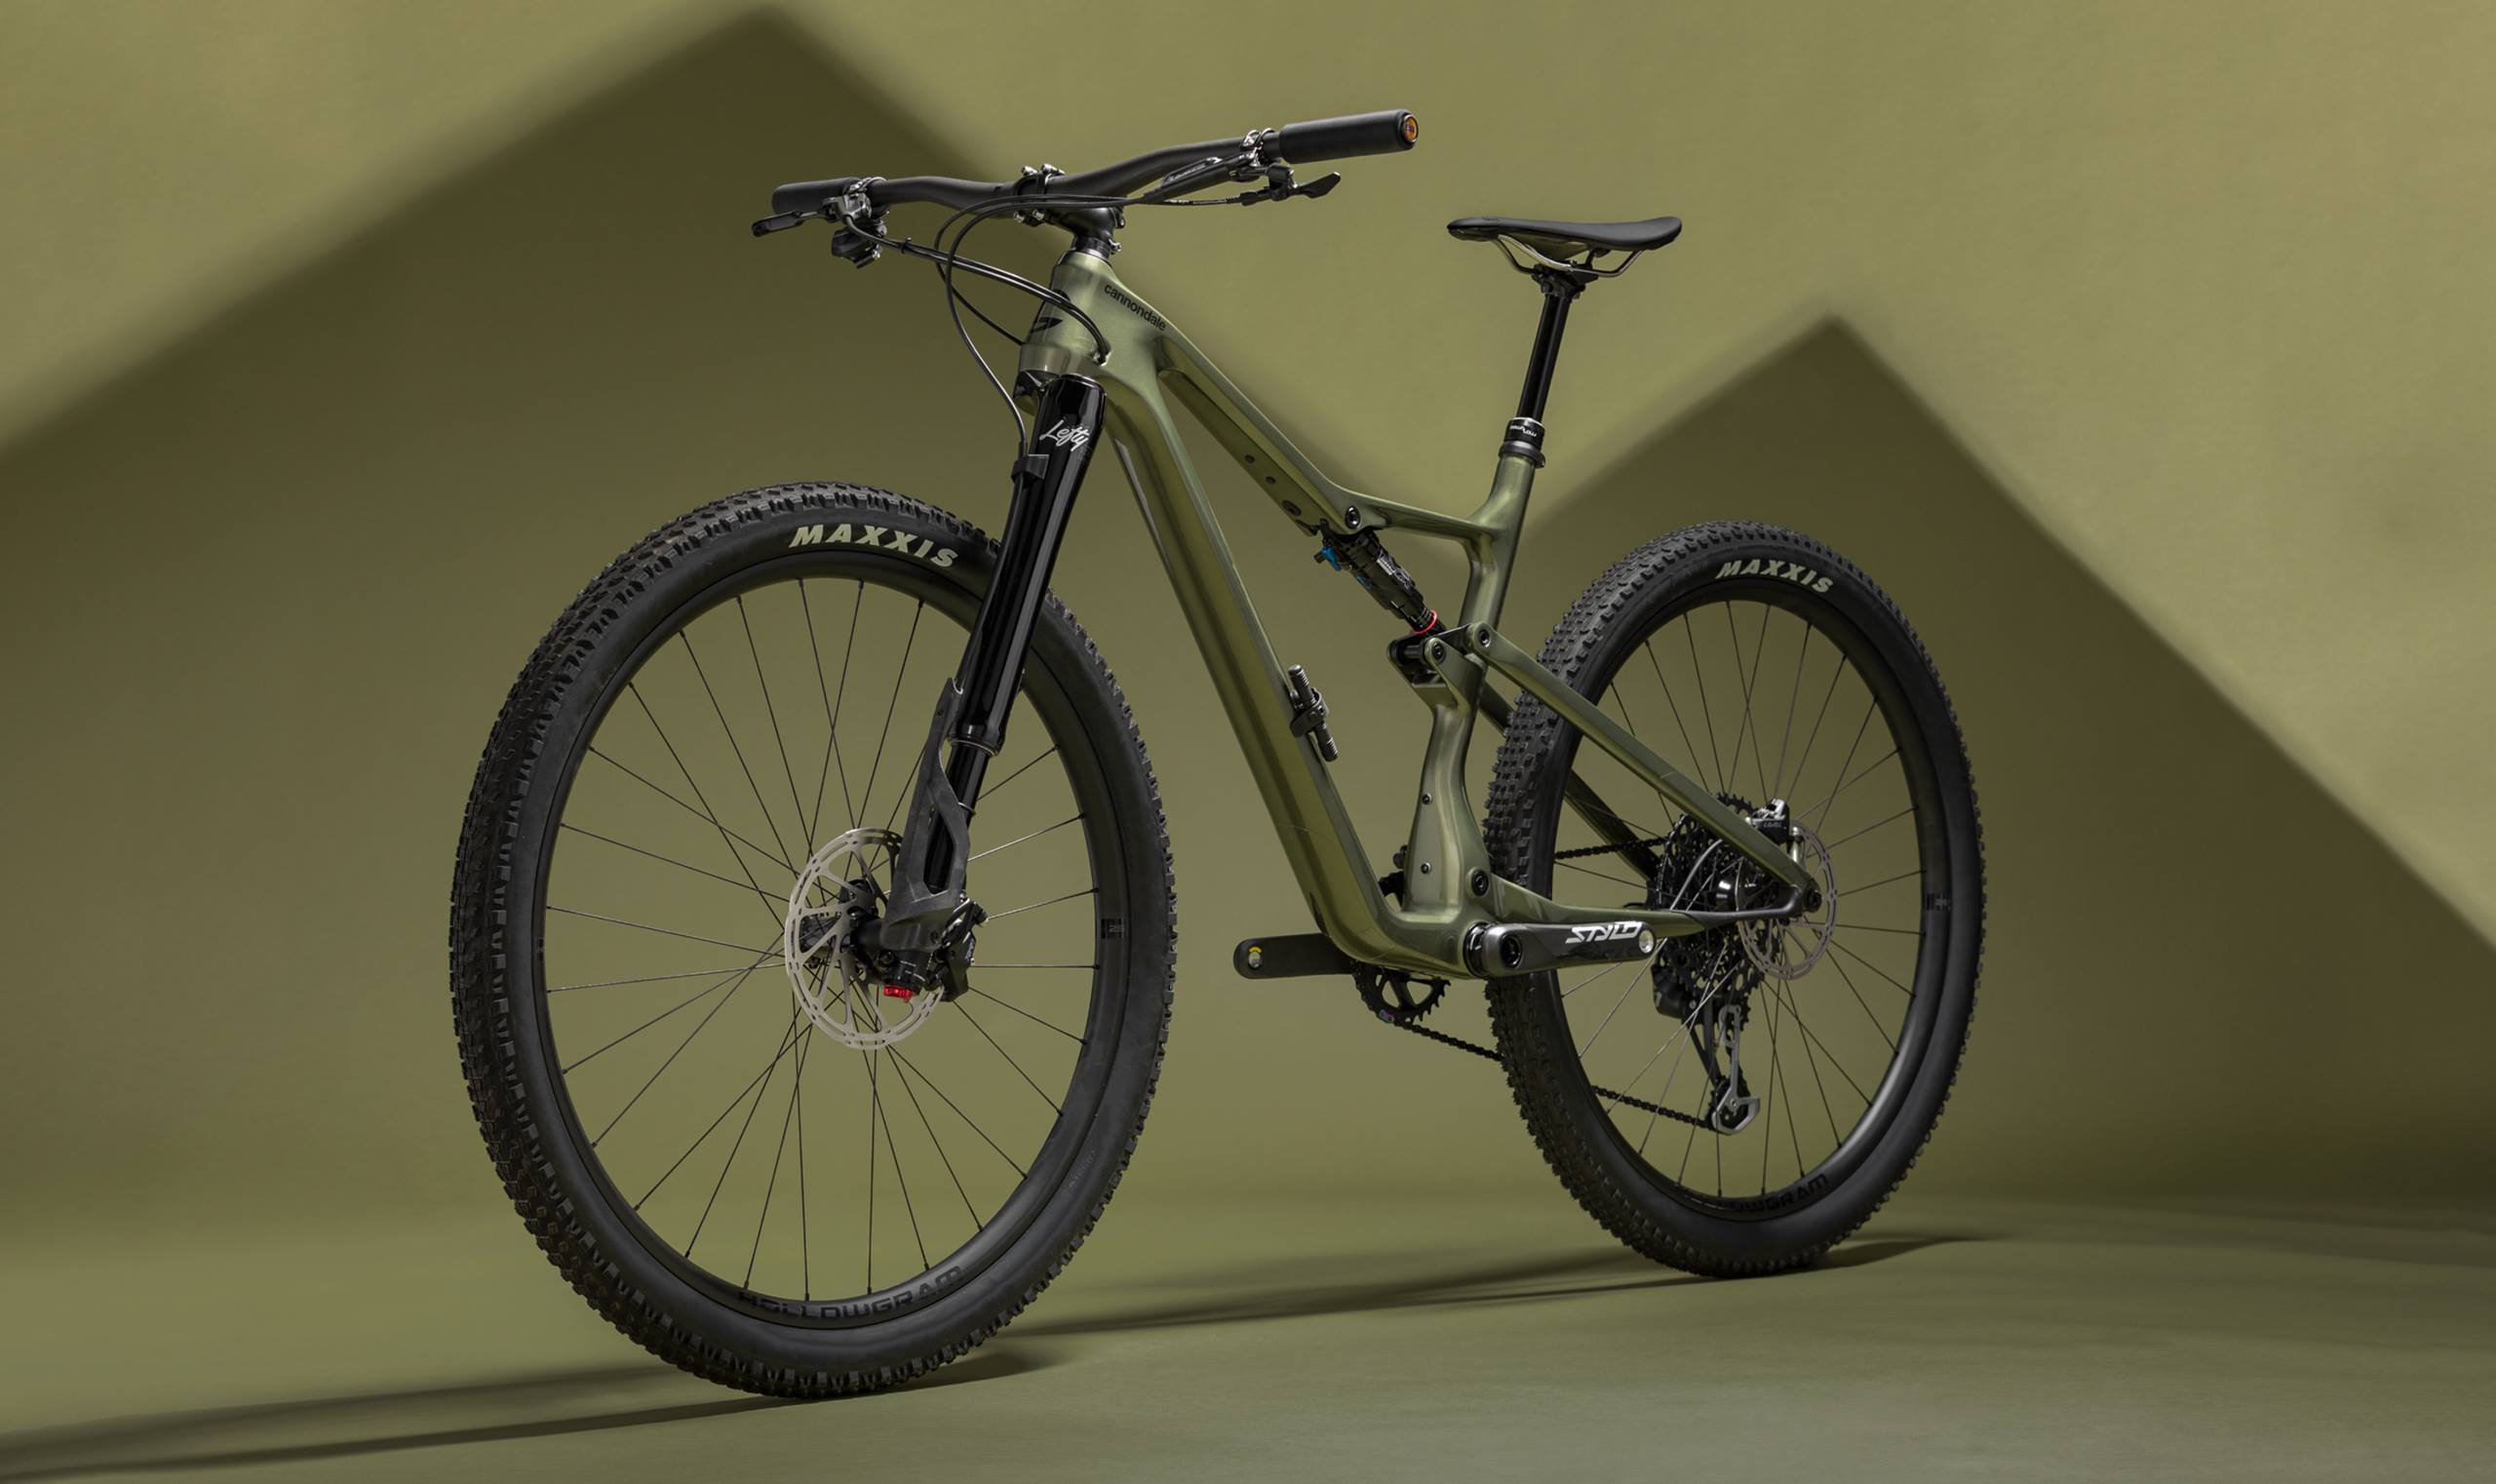
Cannondale Scalpel with a Lefty Ocho fork.
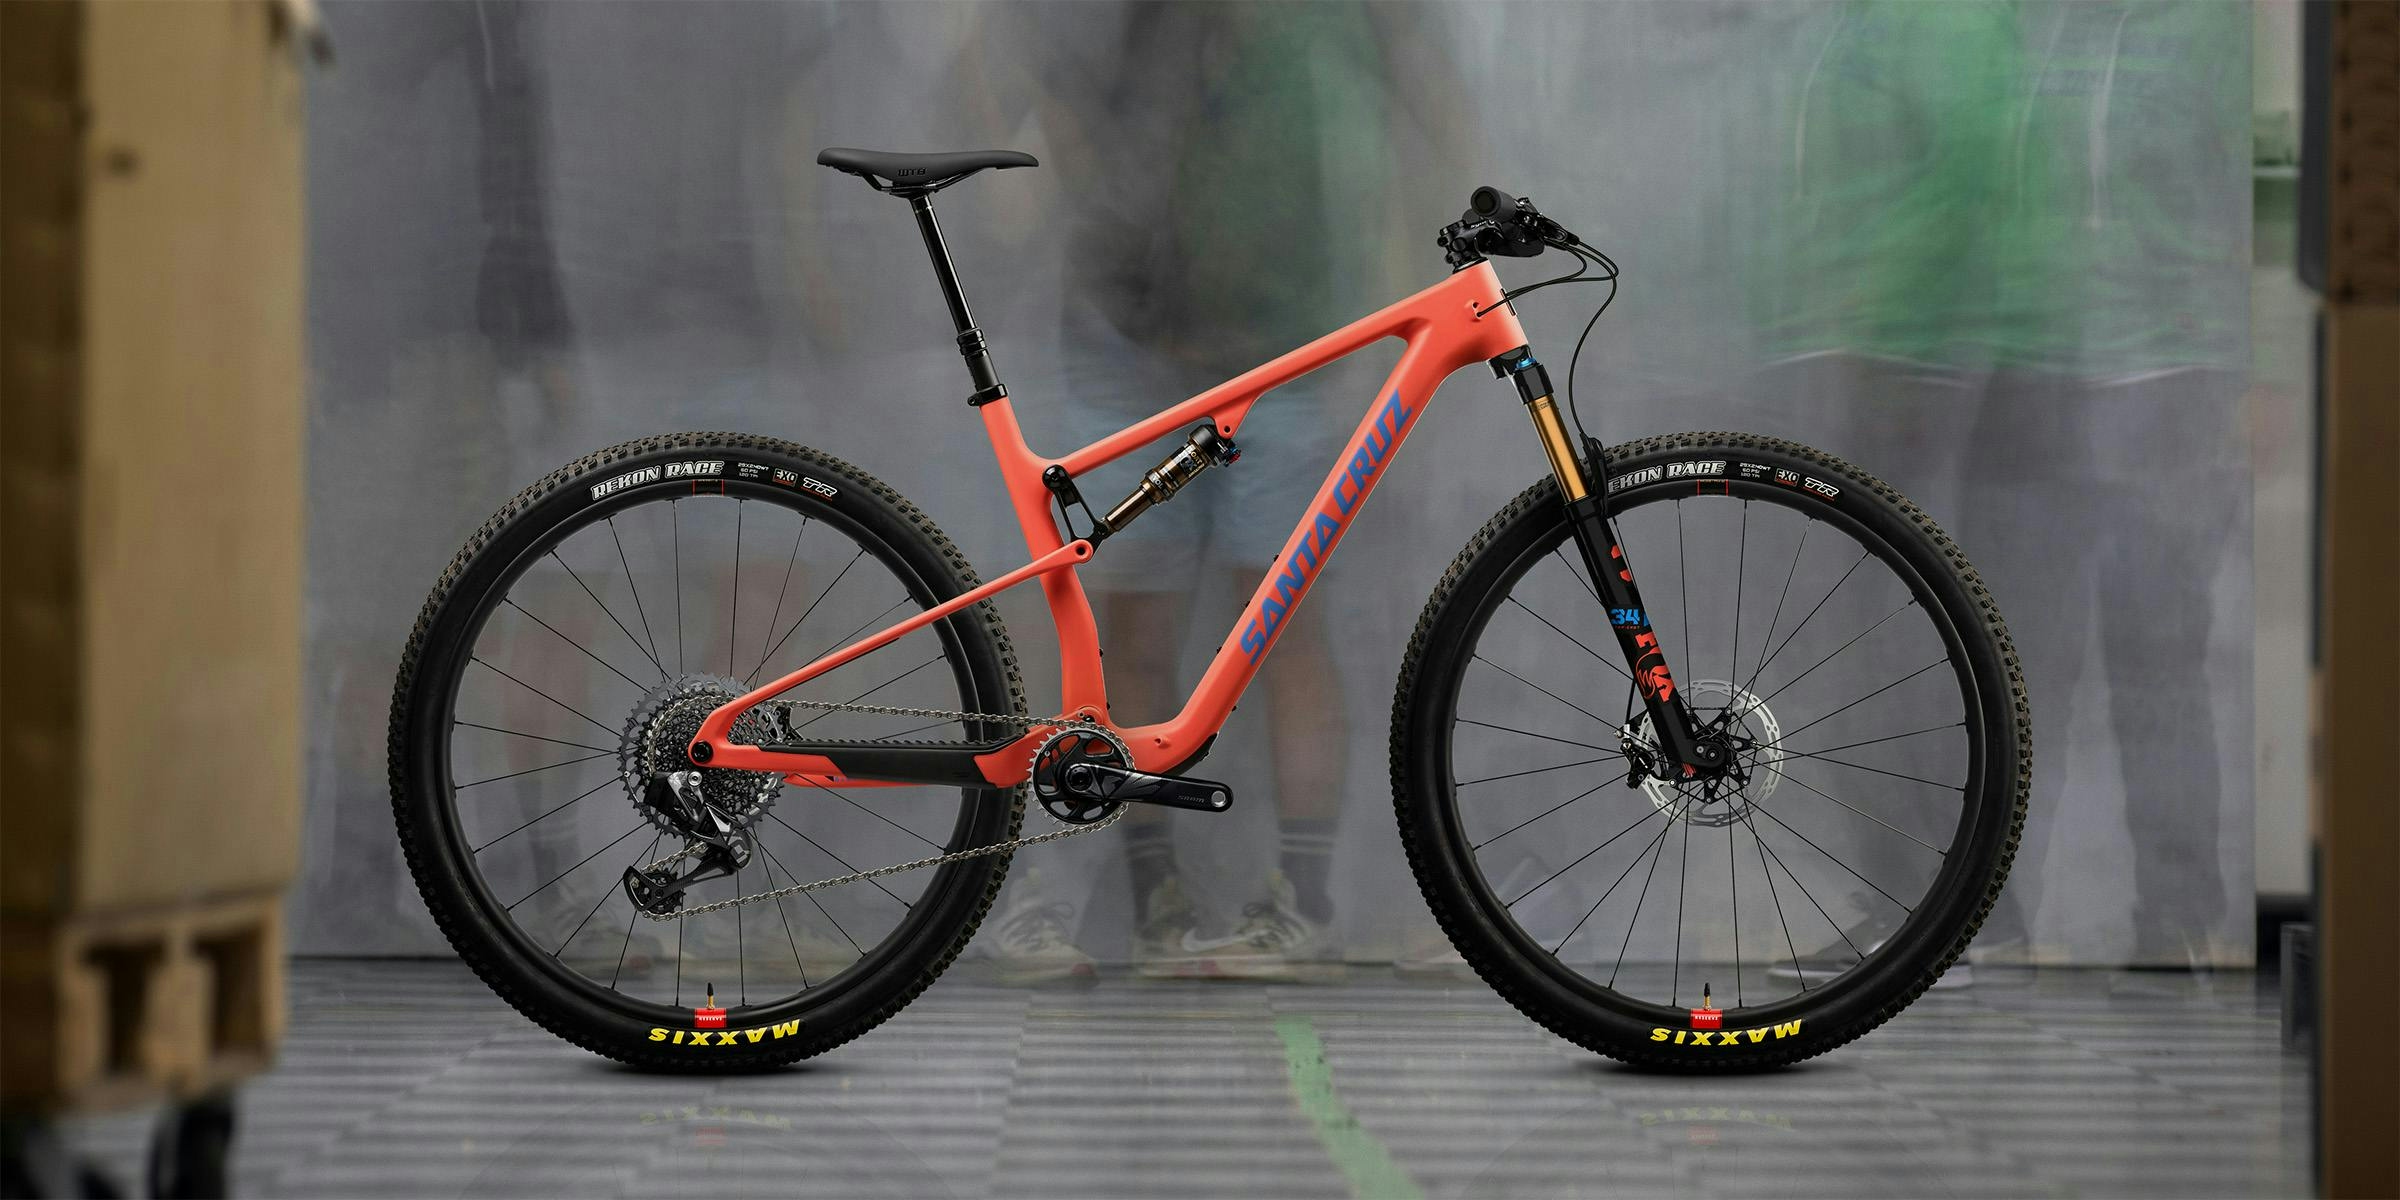
Most MTB forks use air springs, thanks to their lighter weight and tunability. However, cheap beginner mountain bikes and some downhill mountain bikes still use coil springs or offer them as an alternative, like the Santa Cruz Nomad.
Mountain bike forks for adults’ bikes range from 100 to 200mm of travel. Forks with less than 100mm travel are typically only for hybrids or kids’ MTBs.
- Cross-country: 100-120mm
- Trail: 120-150mm
- Enduro: 150-180mm
- Downhill: 180-200mm
The amount of travel required is specific to the trails ridden and the riding style; more isn’t always better. Extra travel means more weight (in a fork of equal quality), lower efficiency, and more sluggish handling.
Another critical measurement in bike suspension fork design is stanchion diameter. When the fork experiences an impact, a small amount of lateral flex occurs in the stanchion; the thicker the stanchions, the less they flex. A fork designed to handle harder and faster hits needs wider, stiffer stanchions to ensure they don’t flex too much and cause damage.
Wider-diameter stanchions flex less, which is better for more extreme riding like the enduro or downhill. However, the trade-off for wider stanchions is extra weight, so weight-conscious disciplines, like XC, use narrow-stanchion forks.
- Cross country and Trail: 30-32mm
- Trail: 32-34mm
- Enduro: 35-38mm
- Downhill: 40mm
Guide to Mountain Bike Rear Suspension
A fork shock moves together with the front wheel because the fork shock directly connects to the front axle. In contrast, the rear shock indirectly links to the rear wheel, requiring one or more pivot points that allow the rear wheel to move along a variable yet predictable path as the shock compresses.
Interestingly, the first rear suspension MTBs actually used forks in the rear dropout, but this was an ineffective design and was quickly discontinued.
This section will mention several important suspension kinematics concepts, which we will explain in more detail in the following section. Now, let’s take a closer look at rear suspension and how it works.
Mountain Bike Shock Anatomy and Measurements
Several different components make up a MTB shock. So you can better understand how rear mountain bike suspension shocks work, we’ve labeled this Fox Float DPX2 air shock. Coil mountain bike shocks are primarily used on heavy-duty downhill mountain bikes as they don’t lose performance from heat buildup like air shocks.
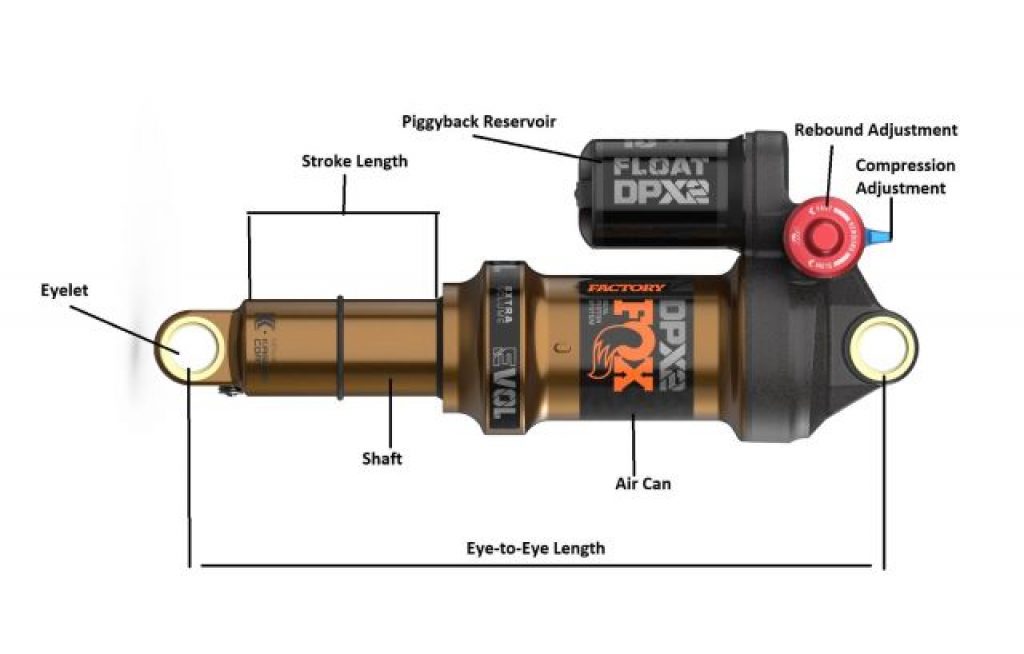
- Eye-to-eye – The total length of the shock, measured as the distance between the two eyelets (mounting points).
- Stroke length – The distance the shock compresses under load.
- Rear travel – The distance the wheel compresses when the shock is fully compressed.
- Leverage ratio – How much the rear wheel compresses in relation to the shock. For example, a 2:1 leverage ratio means the wheel compresses 2mm for every 1mm of shock compression.
- Linkage – The components in the frame’s rear that connect the rear MTB shock to the rear wheel.
- Piggyback reservoir – This keeps the damper reservoir away from the main body to reduce the effect of heat buildup on the damper’s function, increasing performance.
Mountain Bike Rear Suspension Types and How They Work
Rear mountain bike suspension is a much more complex system than front suspension, as they rely on one or more pivots in the frame and linkages to connect the MTB rear shock and the rear wheel. The pivot(s) allows the rear triangle and linkages to articulate and simultaneously compress the rear wheel and rear shock, according to the leverage ratio.
Rear shocks typically sit within the frame’s main triangle, but the position within the main triangle changes in each system. One side of the shock mounts to a point in the main triangle, and the other side mounts to the rear triangle.
In general, rear mountain bike shocks perform the same task as the fork, absorbing impacts to improve comfort and help you maintain control and traction by keeping the rear tire in contact with the ground.
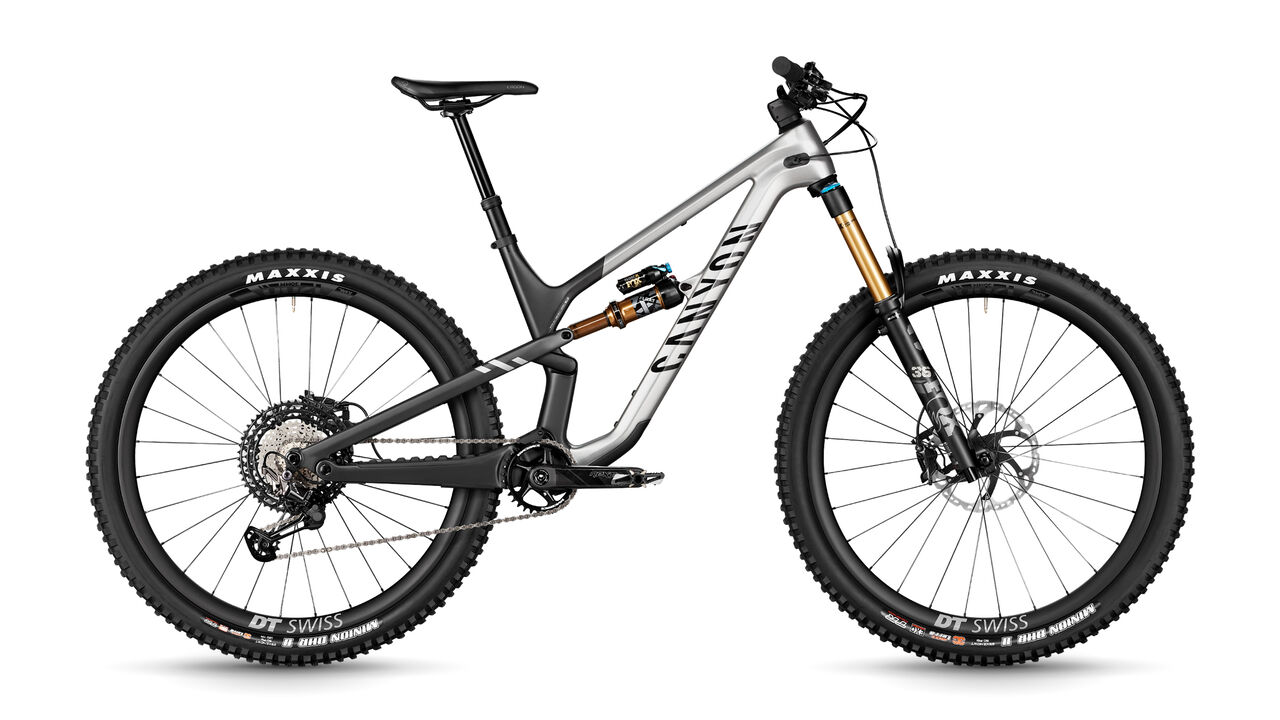
There are four broadly-used rear suspension configurations, each with its own subtle advantages and disadvantages. The average recreational mountain biker won’t notice much difference between rear mountain bike suspension types.
-
Single Pivot
The Santa Cruz Blur uses a simple single-pivot configuration.
In single-pivot rear suspension, the rear axle pivots in a constant arc around a single unmoving point. A continuous swingarm links the rear axle, the main triangle (on the top tube or downtube), and the shock.
This simple design reduces mechanical complexity and weight and makes the bike easier and cheaper to maintain. In addition, there is no patent on the design, so that any manufacturer can use it.
The downside of the single pivot system is the linear leverage ratio, meaning that the resistance to compression increases at the same rate, and you can’t modify the leverage curve.
-
Linkage-drive Single Pivot

The Commencal Meta TR uses a single pivot with the four linkages.
The closest design to the single pivot configuration is a linkage-driven version. This system also uses a solid swingarm connecting the main triangle to the rear axle and pivoting around a single point. However, instead of connecting directly, the swingarm uses linkages to connect to the shock.
Various iterations of this design exist, but the general function is the same. A solid swingarm connects the rear axle and a single pivot. This swingarm rotates around this pivot with a fixed instant center throughout the travel.
Using the linkages, engineers can control the leverage ratio curve, so you can have a progressive curve instead of being stuck with a linear one. For example, manufacturers could select a stroke progression that’s softer at the start, providing better small bump sensitivity. Alternatively, a firmer start to the stroke would increase pedaling efficiency.
The downside of this system is extra mechanical complexity, meaning more maintenance and expensive repairs. In addition, the fixed instant center means designers can’t modify anti-squat and anti-rise characteristics independently.
-
Four-bar (Horst-link)
The Canyon Spectral uses a Horst-link with a pivot on the chainstay at the axle.
Specialized first popularized the four-bar suspension platform, with several brands now using their own variation. The main characteristic of this design is the pivot point on the end of the chainstay just below the rear axle. Instead of connecting to the chainstay, the axle connects to the seat stay.
The rear axle has a modified path that rotates around an instant center that changes position as the MTB rear shock moves through its travel because it’s not directly connected to the main triangle. This design allows engineers to manipulate anti-squat and anti-rise characteristics at different stages of the travel.
In general, manufacturers that use four-bar systems optimize for low anti-rise, so the braking forces have minimal impact on the suspension. Alternatively, you can design Horst-link suspension to have high anti-squat at the beginning of the stroke and less at the end. Higher anti-squat means less pedal bob but more pedal kickback.
In addition to having control of anti-squat and anti-rise, Horst-link suspension gives designers control over the leverage ratio curve. The downside is that these systems typically have lower anti-squat, meaning they’re less efficient.
-
Twin-link
The Giant Trance X uses their proprietary Maestro twin-link suspension with co-rotating rocker links.
Twin-link systems usually use a fully rigid rear triangle that connects to the main triangle using two rocker links. Instead of being located beside the axle, the chainstay pivot is much closer to the main triangle. In the twin-link design, either the rear swingarm or one of the rocker links will drive the shock.
The twin-link design looks similar to a single pivot but performs similarly to the Horst-link with four pivot points, meaning the instant center can be designed to move throughout the travel. Again, an instant center that moves as the suspension compresses gives engineers control over the handling characteristics at different stages of the travel.
A critical differentiation between twin-link designs is the rotation of the rocker links. Some systems have counter-rotating links, like Santa Cruz’s Virtual Pivot Point (VPP), while others, like DW-Link and Giant’s Maestro, use links that rotate in the same direction. Each configuration has specific characteristics which impact the system’s performance.
Twin-link suspension is highly tunable, like four-bar suspension, but the curves aren’t as predictable. Finally, a potential benefit is that the anti-squat and anti-rise are more consistent throughout the travel.
-
Alternative Designs
In addition to the four configurations described above, popular brands have their own proprietary iterations that attempt to improve performance. Let’s take a brief look at two of the most popular.
Firstly, you have Yeti’s Switch Infinity. This design uses a patented translating pivot that switches direction as the bike moves through its travel. This setup theoretically gives Yeti independent control over anti-squat and leverage ratio curves.
High pivot is another unique design that brands like Cannondale (Jekyll), Norco (Shore), and Devinci (Spartan) are using on select models. This distinct system uses an idler pulley to route the chain over the pivot point.
High pivot suspension has a more rearward axle path, improving impact absorption and increasing pedaling efficiency. However, there is more drivetrain drag, extra mechanical complexity and maintenance, and the geometry varies through the travel.
Key Mountain Bike Suspension Concepts
Understanding suspension kinematics concepts will help you understand how the different designs influence handling.
Bike designers must optimize how the system responds to braking forces, absorbs impacts, and influences pedaling efficiency.
Instant Center
The instant center is the point that the rear axle is rotating around at a given instant in the travel. For example, on a single-pivot rear suspension, the instant center is fixed at the pivot point, meaning the rear axle has a constant arc. Alternatively, manufacturers can create an instant center that floats (migrates) throughout the rear shock compression by using a combination of linkages.
To find the instant center at a given point, you draw a line through the pivot points of the top two linkages and another through the bottom and mark the point where the two lines intersect.
As the instant center moves, the anti-squat and anti-rise characteristics change. Designers can manipulate the path of the instant center to get their desired effects on performance at specific points in the travel.
Pedaling Efficiency
Pedaling efficiency refers to the percentage of energy that reaches the rear wheel from each pedal stroke. Generally, the more suspension a bike has, the less efficient it is to pedal. However, there are notable variances between suspension systems. The trade-off of higher efficiency is a less plush ride.
The most advanced suspension designs can maximize pedaling efficiency in the early part of the travel, where it’s most important, and let it digress throughout the travel.
What Is Pedal Bob?
‘Pedal bob’ is an oscillating motion that occurs when you push the pedals. To illustrate, you push the bottom bracket down, and your weight moves back as the bike accelerates, compressing and rebounding one or both shocks.
Unwanted compression and extension lead to wasted energy that the shock absorbs instead of transferring to the rear wheel. As a result, pedal bob is most impactful on climbs where pedaling efficiency is most notable to the rider.
What Is Anti-squat?
Anti-squat refers to how much the system resists the compression that occurs during pedal bob, creating a more efficient pedaling platform. Simply put, it’s how the suspension reacts when you accelerate.
The force that resists squatting (anti-squat) is called the chain-pull force. It comes from the tension in the chain that pulls the swingarm back down when the shock compresses and the rear wheel lifts. Increasing anti-squat reduces the sensitivity of your suspension, making for a harsher ride.
Manufacturers represent anti-squat in percentages. 100% would theoretically mean there is no pedal bob, as the squat and anti-squat forces cancel each other out. Less than 100% would amplify the squat forces, not counteract them, while greater than 100% would extend the suspension, which is actually necessary for some high-travel bikes to offset shifts in rider weight.
Because anti-squat depends on chain tension, the anti-squat percentage is different in each gear on the cassette or if you have multiple chainrings. In addition, factors like the rider’s center of gravity and where the shock is in its travel will contribute to the actual anti-squat in a given moment.
With so many variables to consider, giving a specific formula for the optimal anti-squat characteristics is impossible. It’s down to the manufacturer’s preference. Ideally, you want anti-squat to peak in the early to mid part of the travel and then drop off, which systems like Santa Cruz’s VPP achieve.
What Is Pedal Kickback?
Pedal kickback is the sudden backward movement of your pedals when the suspension compresses. When your mountain bike’s rear shock compresses under the force of an impact, your wheel and the attached cassette lift simultaneously. When the cassette lifts, it tugs on the chain, causing ‘chain growth’ and rotating the chainring backward.
The more anti-squat a bike has, the more pedal kickback it experiences in a proportional relationship. Manufacturers can reduce pedal kickback by using an idler pulley like in the high-pivot system.
You can decrease the anti-squat to minimize pedal kickback and increase the sensitivity of your bike mid-ride by shifting into harder gears (the smaller cogs on the cassette and the larger chainring if you have multiple). This technique is valuable when approaching rock gardens or rough descents.
Absorbing Impacts
Nobody would argue that suspension’s most important function is absorbing impacts. The last thing you want when riding on mountain trails is the energy from landings or big hits to repeatedly transfer from the rear wheel into your body.

One of the main purposes of mountain bike suspension is to absorb impacts and make the ride more stable and comfortable. | Image source: cannondale.com
For this article, we won’t cover the kinematics of impact absorption in detail. However, it’s worth noting that suspension designers try to optimize the wheel path and the wheel rate for the specific bike.
The wheel path is a set path that the axle follows when there is an impact on the rear wheel. The wheel rate correlates to the stiffness of the shock at different points in the travel. Wheel rate can be progressive (soft at the start, firm at the end), linear, or digressive (firm at the start, softer at the end).
Gravity-focused MTB disciplines favor progressive wheel rates to prevent harsh bottom-outs and increase small bump sensitivity.
Braking Efficiency: What Is Anti-rise?
Anti-rise is the effect of braking forces on the suspension or how much the suspension compresses or extends from braking. By manipulating this, manufacturers can create a stable or active response to braking forces.
When you brake, your weight shifts forward, putting more pressure on the front of the bike and less on the rear, making the rear extend. Anti-rise counteracts this extension, so the bike stays level under braking forces.
In theory, high anti-rise makes the suspension feel harsher; therefore, manufacturers try to keep a low anti-rise percentage. 0% anti-rise means the suspension stays active and plush. 100% anti-rise means it doesn’t extend or compress from braking, and the geometry remains the same.
No suspension system can be completely isolated from braking forces, and the right balance of anti-rise to anti-squat and the other suspension kinematics is down to the type of bike.
How to Set up and Adjust Mountain Bike Suspension
Take time to set up your suspension and adjust it regularly to ensure it performs how you need it to, and avoid damaging the components by bottoming out too frequently.
Adjustments
There are several possible adjustments you can make to suspension. Higher-end components have more adjustability and more precise controls.
- Lockout – As mentioned, the lockout closes the damper to eliminate compression. Most bike suspension components, even hybrid forks, have a lockout lever, usually located on the top of the stanchion or on the shock body. However, premium MTBs may have a remote handlebar lever to control lockout. Use this adjustment when you ride on pavement or climb on smooth trails.
- Air pressure – Instead of using a mechanical preload as you would on a coil fork, air suspension forks use a Schrader valve, like those on tires, to adjust the air pressure. These require a specific shock pump, don’t use your tire pump. The fork valve is typically located on top of the stanchion under a cap or at the bottom of the lowers. You can reference your manufacturer’s setup guide to find their pressure estimate based on weight and frame size, but use sag to find the precise measurement.
- Preload – Adjust coil spring preload with the preload knob on top of the stanchion or the collar on the shock body. Increase the preload if your fork feels too soft, and decrease it if it’s too firm. The adjustment range is much lower for coil preload compared to air pressure. Big adjustments will require swapping out the coil.
- Damping – Most modern shocks allow you to tune them with compression and rebound damping. Compression damping also breaks down into high-speed compression and low-speed compression. High-speed compression damping controls how the shock reacts under big hits and landings; low-speed controls how it reacts under slow inputs like shifting weight. Increasing low-compression damping holds the suspension higher up in the travel and reduces pedal bob.
Basic Mountain Bike Suspension Setup
A basic suspension setup can help you get onto the trails quickly after buying a new bike. The following instructions include the most important initial adjustments. However, most shocks and forks offer extra adjustments that can fine-tune your suspension even more.
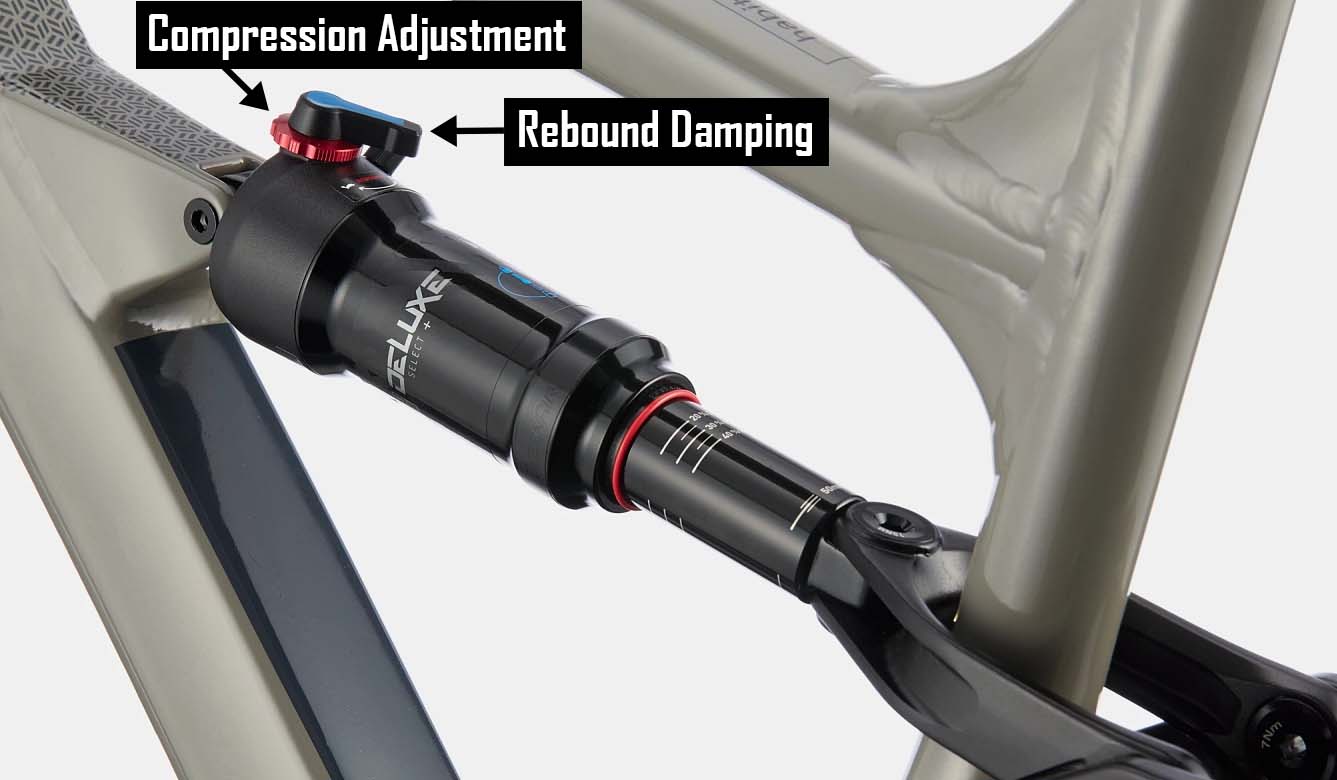
Compression and rebound suspension adjustment on an air rear shock.
Begin by getting dressed in your typical riding gear and carry your backpack or hydration pack if you usually ride with one. Next, inflate your tires to the correct air pressure, and pack your shock pump (if you have air suspension).
Then, take your bike to an open space where you can ride around slowly without interfering with traffic, such as an empty parking lot.
id=sag
Setting Sag
Recommendations for sag depend on the discipline and the manufacturer. You can choose higher or lower settings based on your riding style and preferences. For more conservative riding or inexperienced riders, aim for more sag. Fox recommends the following:
- Rear shocks: 25-33%
- Forks: 15-20%
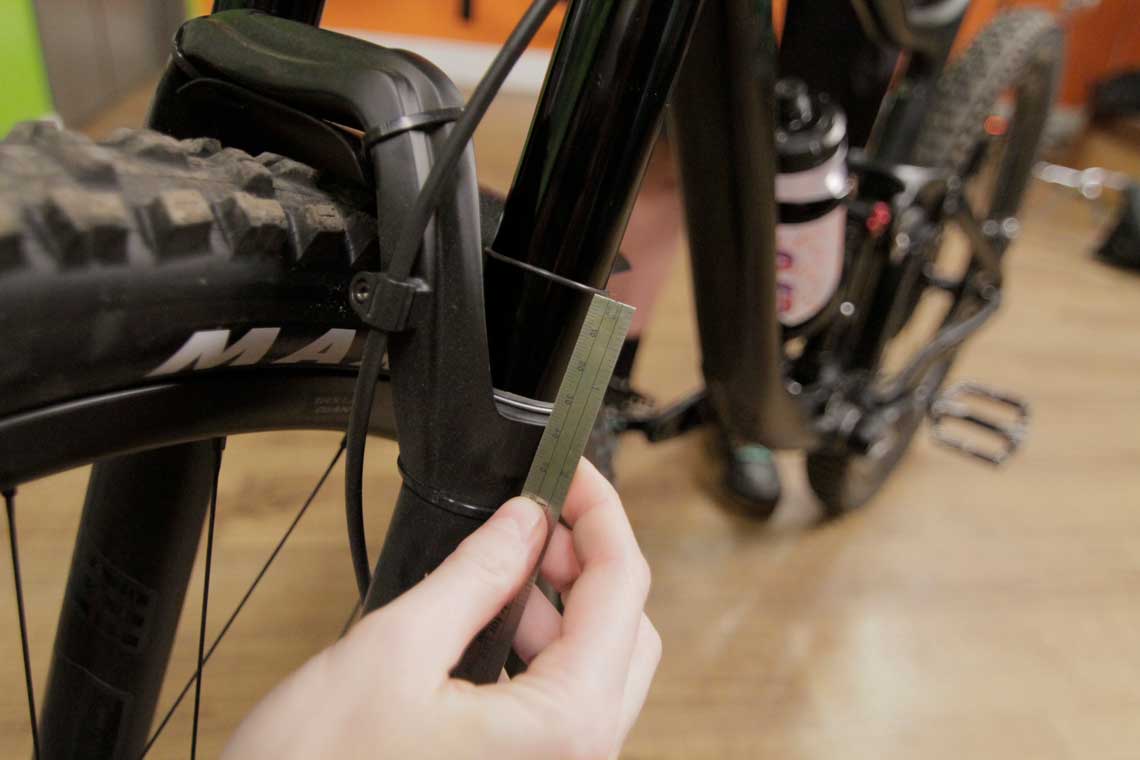
The o-ring lets you fine-tune the sag setting by allowing you to measure the travel. | Image source: liv-cycling.com
Before beginning, ensure that the lockout setting is off and that your compression adjustments are in the most open position. To set the rear sag, move the thin rubber ring on the shock (O-ring) to the end of the shaft flush with the shock body (if your suspension doesn’t have an O-ring, use a rubber band or a zip tie).
- Sit onto the saddle slowly, and allow your weight to press down with your feet off the ground.
- Dismount and note the position of the ring. On Fox suspension, the shaft has marks to indicate sag. If yours doesn’t have any, you must measure the distance to the ring and calculate it as a percentage of the total travel (usually indicated on the shock or fork). If you have more than your desired sag, say 29% instead of 25%, you need to add air pressure using your pump. If you don’t have enough, bleed some air.
- Unscrew the cap on the air valve and pump or bleed the air. Note the pressure before disconnecting the pump (in case you need to make more adjustments).
- Push down on the saddle to pump the suspension a few times to balance the air pressure inside.
- Measure the sag again by repeating step one and keep repeating the process until you hit your desired sag.
You can set up fork sag using the manufacturer’s air pressure chart or a similar process to the mountain bike rear shock.
- Push the ring on the fork stanchion to the bottom.
- Sit on the bike and start rolling. Then, slowly stand up and assume an attack position without bouncing the fork.
- Allow the fork to settle under your weight.
- Slowly bring your weight back to a seated position and gently stop the bike.
- Repeat the same pumping or bleeding process as required to reach your targetted sag, and note the air pressure.
- Retest the sag and repeat the process if necessary.
Setting Progression
Progression is set based on the force it takes to bottom out the suspension.
- Use the O-rings to measure this by pushing the fork ring to the bottom of the stanchion and the shock ring flush with the shock body.
- While rolling on flat terrain, stand up in an attack position and bounce on the fork as hard as possible without leaving the ground.
- Repeat this single explosive bounce, but focus on the rear shock this time.
- You should use between 80 and 90% of your fork travel and roughly 90% of the shock travel during this test, indicated by the rings.
- If you use more travel than you want to, your suspension is probably too soft. Add a volume spacer or set a lower sag percentage to address this.
- If you don’t use enough travel, you could remove a volume spacer or set a slightly higher sag.
Rebound
Rebound controls how fast the shock returns after compression—an appropriate rebound setting balances sensitivity and traction. You can use the air pressure of your shock and fork to set the rebound. The manufacturer’s setup instructions should have a guide for selecting the rebound lever position based on shock pressure. Alternatively, follow these steps.
- Start with the rear shock by turning the red rebound adjustment clockwise until it’s fully open.
- Find a sidewalk nearby and ride off at around walking pace while sitting on the saddle, noting how the suspension feels when you drop off.
- You want the suspension to compress, rebound slightly past the sag point, and compress again to reach the sag point.
- Repeat the process to achieve this effect, turning the rebound lever counter-clockwise with one click each time and noting the effect.
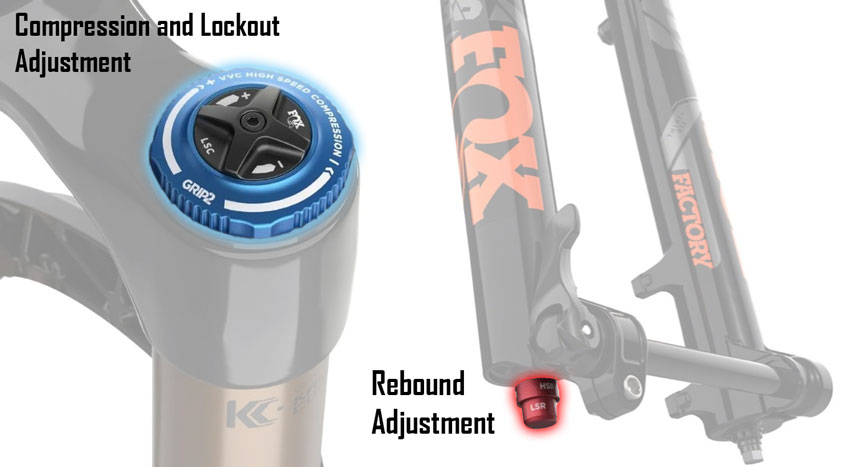
Compression (blue), Lockout (black) and Rebound (red) adjustment knobs on a Fox 36 Float Factory Grip 2 fork.
The fork uses a slightly different process (this works for hardtail bikes).
- Open the rebound on the fork fully by turning it fully clockwise.
- Without mounting the bike, push down hard on the handlebars and release suddenly so the fork can bounce up.
- Turn the rebound lever counter-clockwise one click and repeat this process until the wheel starts leaving the ground upon release.
- Then, turn the lever clockwise one more time, so the rebound is set at the fastest speed possible before the tire starts to leave the ground on release.
Double-check Rebound Speed
For full-suspension bikes, you want to ensure both the fork and the shock return at the same speed. If you’re unsure, err on the side of caution and set it so the fork returns slightly faster than the MTB rear shock. If the shock rebounds faster, it will cause a bucking motion.
Share this on: