Tubeless Tires Guide — All You Ever Wanted to Know
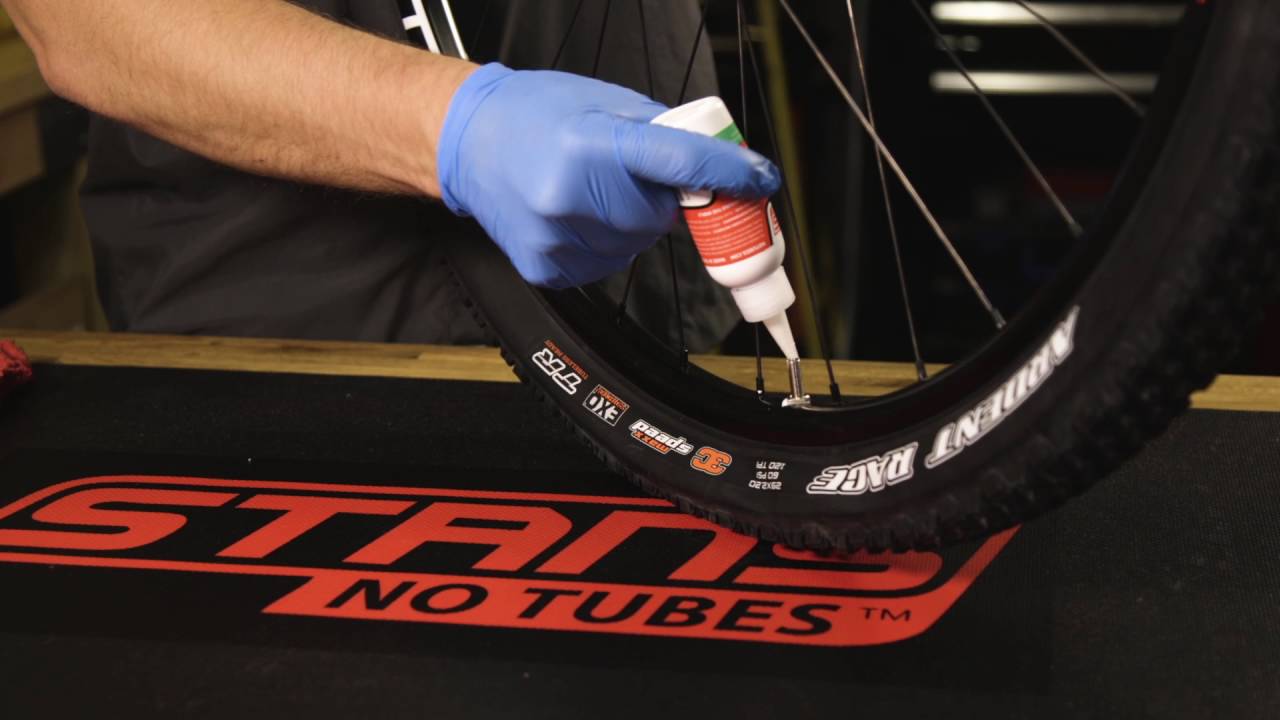
Image source: Stan’s NoTubes
If you’ve ever been out on your bike and punctured for the second time in the same ride, with the stark realization you’re now out of inner tubes, then you’ve probably wondered whether you should go tubeless.
Traditionally used by mountain bikers, it’s a technology that’s now crossed over to gravel, cyclocross and road bikes. Although the past is plagued with horror stories of sealant flying everywhere and tubeless bike tires being nigh on impossible to get onto wheels, the technology has thankfully moved on to being a more reliable way to ride without flats.
In this article, we’ll define tubeless tires, look at the advantages and disadvantages of using them, and answer some of the most frequently asked questions about the topic.
What Are Tubeless Tires?

A visual diagram showing the difference between clincher, tubeless, and tubular tires. | Image source: Hunt Bike Wheels
Tubeless tires are quite simply, tires that do not use an inner tube.
But what exactly is a tubeless tire? What is the difference between them and tires that use tubes, and how do tubeless tires work?
At first glance, you’d be forgiven for thinking that tubeless bicycle tires look very similar to clincher tires. But the rubber compounds and same treads are where the similarities stop. Essentially, for a tubeless tire to work, it needs to form an airtight seal to the wheel.
You might have heard of wheels having hookless or hooked rims – it is important you get ones that are tubeless compatible otherwise the tire won’t be able to form a proper seal with the rim.
There are still valves, just like on clincher tires, but they are attached directly to the rim of the wheel as there is obviously no inner tube for them to attach to. In addition, when setting up tubeless tires you need to pour in a liquid called ‘sealant’.
This liquid helps to plug holes and punctures and stops the tire from leaking air, essentially sealing it. Once this has been installed, the tire can then be pumped up normally.
Clincher vs Tubular vs Tubeless Tires — All Differences Explained
Tube tires or ‘clinchers’ use an inner tube to stay inflated. They can be used on hooked rims and are seated when the bead clicks into place – you’ll recognize the sound, especially if you’re pumping your tire up and get the traditional ‘bang’!
There are plenty of reasons people might choose to use either, depending on the bike they are riding or the type of riding they are going to be doing. We will explore the pros and cons later in the article.
Important Tubeless Tires Terminology
Just like most things in cycling, there are plenty of terms thrown around that you may not be familiar with!
We’ve put together some of the most important terms but feel free to let us know in the comments if you think of any more we should add.
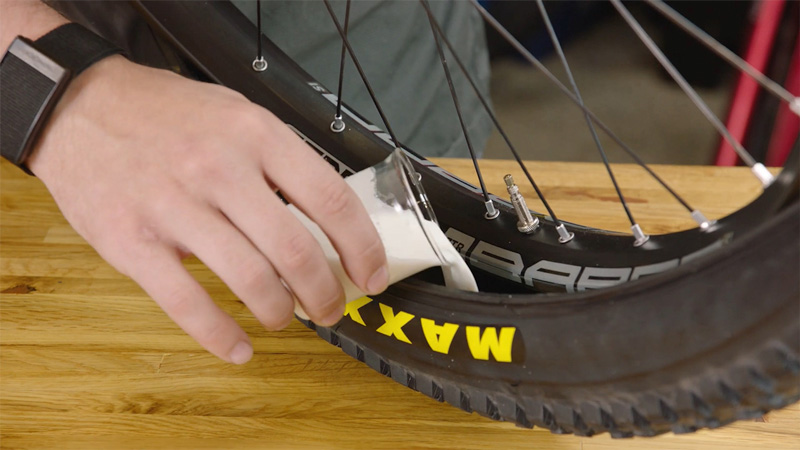
Sealant

Image source: Jenson USA
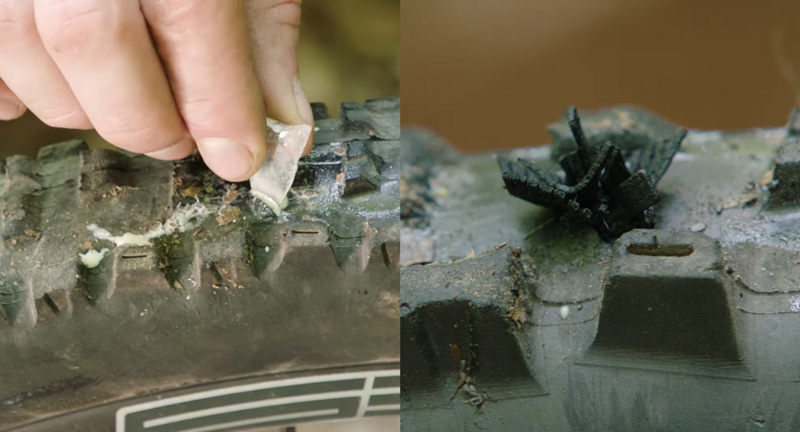
The tubeless tire sealant is the liquid that goes inside the tire and between the rim of the wheel. There are a few types, and each uses its own formula that promises to seal small punctures. Some use a latex base, which is designed to dry when it hits air – i.e. a puncture hole.
This is the most typical type of sealant, although there is something referred to as ‘race sealant’, which uses particles suspended inside the latex, thus allowing it to dry up and plug the puncture more quickly. The downsides to this type of tubeless tire sealant are cost and the frequency with which it needs changing or replenishing.
Tubeless Valve

Image source: Stan’s NoTubes
A tubeless tire valve is a valve that is fitted directly to the wheel of your bike, compared to one that is connected to the inner tube. The valve forms an airtight seal with the tire to stop air from leaking out, and the core is usually removable.
You can accessorize these quite easily with many brands now offering different colors, as well as a choice between Presta and Schrader valves.
However, the most popular type of tubeless tire valve stem is by far Presta. This is because the exterior of the valve is threaded, which means it’s easy to use an external nut to tighten against the rim of the wheel, thus providing more of a seal. Presta cores also often come as removable, so that makes it easier for maintenance purposes.
Tubeless Rim Tape
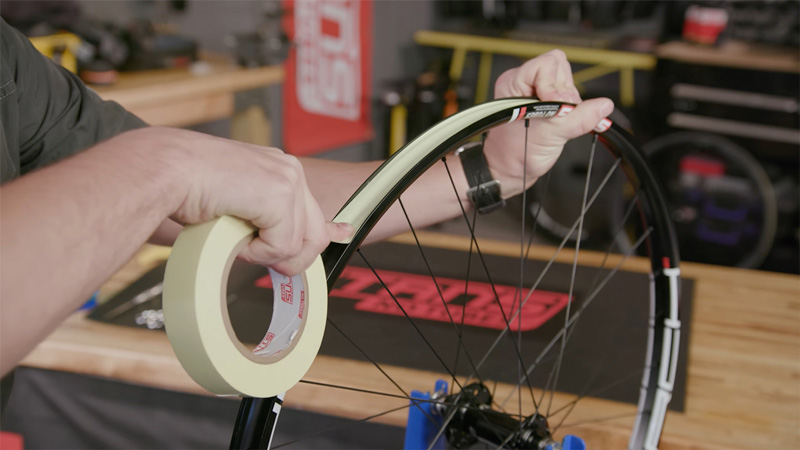
Image source: Stan’s NoTubes YouTube screenshot
Tubeless rim tape is key for successfully installing tubeless tires – especially if your wheels are only ‘tubeless-ready’. Rim tape essentially is what it says, it’s a long strip of usually fabric material tape that goes along the outside of the wheel rims to seal the area between the tire and the rim.
It blocks the spokes from leaking sealant, and if you were running tires with inner tubes, it stops the spokes from tearing the tube and causing punctures.
Bead
The bead is quite simply the part of the tire that grips the rim of the wheel and helps to keep it in place once inflated. If you’ve ever put a tire on a wheel then pumped it up you’ll be familiar with the sound the tire makes when the bead ‘seats’ itself on the rim.
Advantages of Tubeless Tires
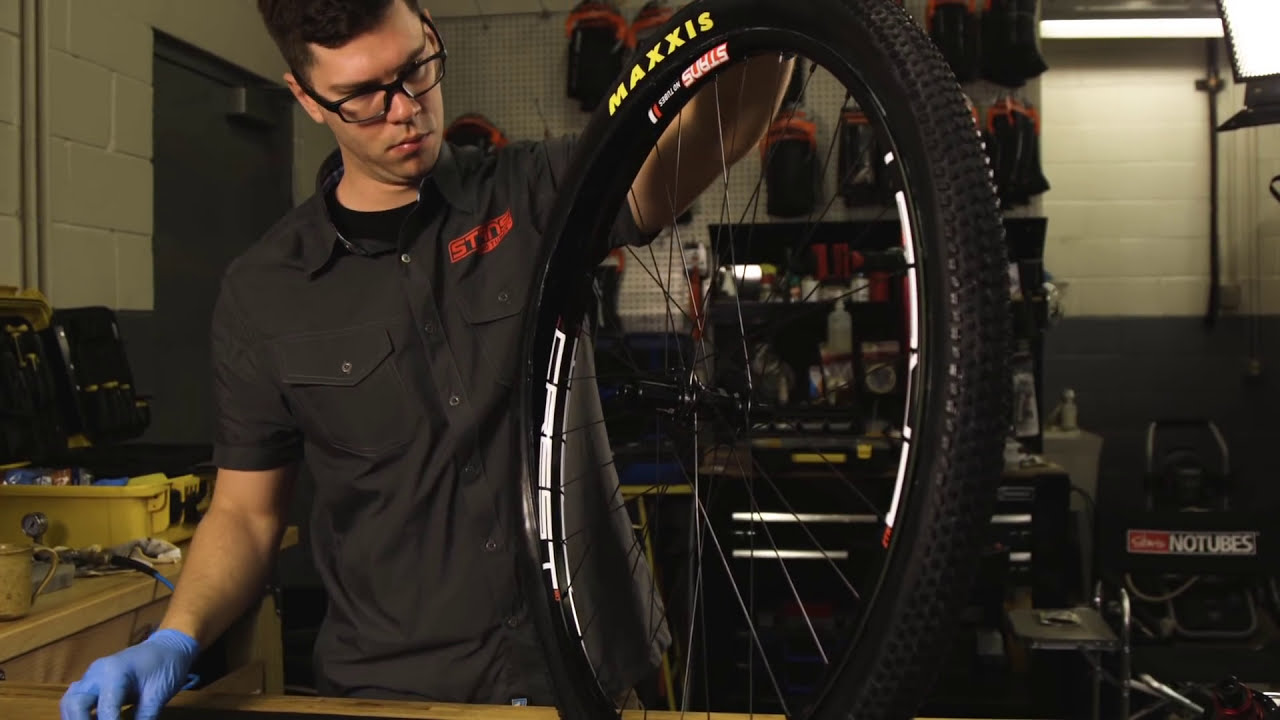
Image source: Stan’s NoTubes
Tubeless tires can be a fantastic addition to your bike if you install them correctly and maintain your bike well.
For instance, tubeless mountain bike tires can be run at much lower air pressures than ones that use inner tubes. Why is this a benefit? In essence, the lower the tire pressure, the more grip your tire has.
Tubeless tires can form a wider base over obstacles like rocks and roots, and it also means you’re much less likely to get a flat from sharp objects.
Tubeless road bike tires are similar in that they can be run at lower pressures, but the world of road cycling is not quite as open-minded about lower tire pressures just yet. However, that’s one of the reasons why tubeless fat bike tires are becoming more and more popular as well.
Furthermore, if running tubeless tires means fewer punctures, that means less time spent fixing them at the side of the road and (you guessed it) more riding! And, even if you do happen to puncture, there is a high chance you can carry on riding.
After all, the whole point of tubeless tires is that the sealant can seal small puncture holes. Therefore, running tubeless tires is less likely to mean a puncture would end your ride.
Disadvantages of Tubeless Tires
Of course, there are some potential downsides to using and installing tubeless tires as well.
Firstly, installing them can be messy and time-consuming. We’ve all seen the videos when this goes wrong and the sealant goes everywhere! And that’s before you’ve even tried to get the tire on the wheel rim.
Of course, the reason they are so tight is to create an airtight seal on the rim, but sometimes it can be incredibly difficult to get them to seat properly.
This also goes for getting the tires off the rims. Say you’re riding and you get a puncture that is too big for the sealant to plug, you can’t carry on riding with a flat tire. Instead, you need to do what tubed tire riders do, and insert an inner tube (and tire plug) in order to re-inflate the tire.
You might need the thumb strength of Thor to be able to get tubeless tires on successfully.
Getting them off the rims can be a difficult affair, and then you have to deal with whatever sealant is left inside when pulling the tire off the rim.
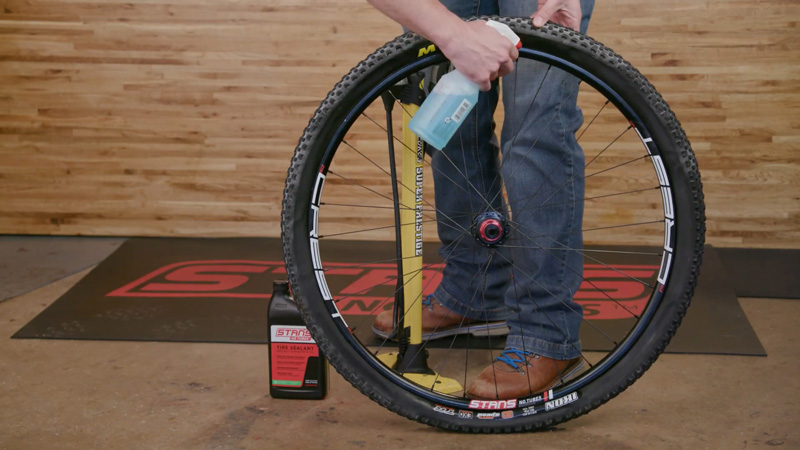
Speaking of sealant, this is something that needs to be topped up every few months depending on how often you ride and whether the sealant coagulates. If you inject the sealant through the valve core then it’s not that tricky, but it’s good to check on the condition of the old sealant by taking the tire off completely before replenishing or replacing it.
And finally, tubeless tires are generally more expensive to buy. Not just because of the added cost of sealant needed to use them, but because the tires themselves are generally more expensive to produce.
Who Will Benefit the Most from Tubeless Tires?

The type of riders that will benefit more from using tubeless tires is generally the ones who mainly ride off-road bikes.
Tubeless tires are great on mountain bikes and gravel bikes especially as they allow you to run lower tire pressures, which in turn can improve rolling resistance. This is helpful for people who want to run things like tubeless dirt bike tires, or other mountain bike tubeless tires on their bikes as it can improve grip as there is more of a contact patch with the surface you ride on at lower tire pressures.
Of course, there are some road riders who use tubeless road tires, but these tend to be professionals who want to run more fragile or thinner-walled tires that offer the best rolling resistance but suffer from a lack of puncture protection.
Tubeless Ready vs. Tubeless Compatible? What’s the Difference?
 Essentially, tubeless-ready and tubeless compatible means the same thing – that the tire or the rim, depending on what component you’re talking about, is built to accept tubeless technology.
In terms of wheel rims, they are generally sold as either Uniform System Tubeless (UST) or tubeless-ready. UST is where there are no holes in the rim except for the valve core hole. This means you don’t need to use rim tape to secure against any sealant leakages. However, this is not a popular designation, with barely any modern wheels or tires now being sold with the UST badge.
Tubeless-ready rims refer to standard wheels with holes in the rim that allow easier access to the spokes. To use tubeless systems with these wheels you need to install tubeless rim tape before pouring in any sealant. What makes the rim tubeless ready is the bead lock design which helps to secure the tubeless tire onto the rim once it has been inflated.
How to Repair a Tubeless Tire?
There are a couple of ways to go about tubeless tire repair, all dependent on what has caused the damage is in the first place.
A tubeless tire repair kit will go a long way to getting you home on a ride, and this usually includes a tubeless tire plug which is something you stick into the tear in the tire to help seal the puncture.
If your tire is not sealed and inflating properly after using a tubeless tire plug, then you might need to use a tire patch.
This is similar to how you’d patch a tire that uses an inner tube. Tire patches usually come in one of two forms – glue patches or self-adhesive ones. These are the easiest to use as you simply peel back the adhesive like a sticker and then stick down to the tire.
The glue patches need a little more care and attention and require the use of glue to stick the patch to the tire.
These methods will generally work on punctures or rips in the tire that aren’t too severe. However, if neither of the above works, then you might have to get out your sewing kit and repair the tire that way.
How to Install a Tubeless Tire Pain-Free?
You might have heard about how difficult this might be, but we’ll explain how to install tubeless tires pain-free.
Firstly, if you have tubeless-ready wheel rims, make sure that you apply some good-quality rim tape. This will be the barrier that keeps everything airtight so make sure that it is fitted securely! Go around the rim and make sure there are no edges sticking up or anywhere you think air might be able to leak from.
Once the tape is secure, you can fit one-half of the tire. Try and seat one side of it along the bead. If you have an inner tube lying around you can partially inflate this then insert it below the tire to help seat the bead on one side. Then remove the tube if you have used one.
Use soapy water to help the tire bead to seat more easily. | Image source: Stan’s NoTubes YouTube screenshot
Now you’ll need to fit the tubeless valve. As we discussed above, they are different from the valves found on inner tubes as they are directly mounted to the rim of the wheel. If you are going to inject the sealant through the valve core, then now is the time to remove the core.
Alternatively, pour the sealant into the base of the tire and then push the other side of the tire onto the rim and seat the bead.
Once the tire appears to be seated, spread the sealant by moving the wheel around and rotating it. Finally, you can pump the tire up to check that everything is air-tight and your tubeless setup is complete!
FAQ
 How to inflate a tubeless tire?
 How to inflate a tubeless tire?
Inflating a tubeless tire doesn’t require a special tubeless tire pump, though a high-volume pump or a compressor would certainly help. As long as the pump you currently have has the correct fitting (Schrader or Presta depending on your valve core), then it will be fine. Simply attach the pump like you would a tubed tire and inflate!
How to install tubeless tires?
To install a tubeless tire, you need a tubeless-ready rim, tape, and sealant. First, you need to seat the bead on one side of the tire, install the valve and pour the sealant. After that, seat the bead on the other side of the tire and use a high-volume pump to inflate it.
What is a tubeless tire?
A tubeless tire is a tire that does not require an inner tube to stay inflated. Instead, it has an airtight seal with the rim of the wheel, and sealant that plugs any small punctures or holes. It was first popular only on mountain bikes, but it’s now the preferred choice for gravel and road riding as well.
Can you put a tube in a tubeless tire?
Yes, you can put a tube in a tubeless tire. It will be more difficult to do so than a non-tubeless tire, but it is still possible and can be used as a backup if the sealant does not plug a puncture mid-ride. A tube can also help you seat the bead more easily while installing a tubeless tire.
How to seat a tubeless tire?
Seating a tubeless tire is done in the same way as a non-tubeless tire. Simply press one side of the tire around the rim when installing it on the wheel, then either insert a tube to help seat the first side before installing the second, or attempt to install the other side and seat that.
The tire is fully seated once you’ve inflated it and you hear the distinctive bang! Do note that you don’t need a specific bike pump for tubeless tires – as long as your current one has the right valve fitment, it will work!
How to add sealant to tubeless tires?
You can either add sealant in a syringe through the valve (with the valve core removed), or you can pour it into the base of the tire before installing it fully. Using a syringe is definitely less messy and also allows you to periodically add sealant without taking the tire off.
How to fix a tubeless bike tire?
There are several ways in which you can fix a tubeless bike tire. Some of the most popular ways include using a tubeless tire plug, a tire boot or patch, or sewing the tire. If none of that works, you can insert a tube to continue riding or you’ll have to replace the tire altogether.
How often to add sealant to tubeless tires?
You should add sealant to your tubeless tires every couple of months, or more depending on if you’ve had a puncture. You should also check the condition and level of sealant still in your tires from time to time, in order to make sure that it hasn’t coagulated.
How to remove a tubeless tire?
Removing a tubeless tire follows the same process as removing a non-tubeless tire. Simply deflate and unseat the bead on one side, before removing the sealant and then removing the other side of the tire off of the wheel.
Read Next
Share this on:


Is the tubeless sealant any better at repairing punctures than the sealant in slime tubes?
Do you have any experience with slime [or other brand, if any] tubes? If so, do they seal snake bite ‘punctures?’
Most of my road bike flats are caused by snake bite punctures. It would seem that the tubeless tires do not suffer such.
Hey Rico, one of the main advantages of riding with tubeless tires is the fact that you can’t get snake bite punctures because there are no tubes.
I haven’t tried slime tubes, but in my opinion, they can’t seal snake bites. However, they seem to work great for regular punctures caused by thorns and so on.