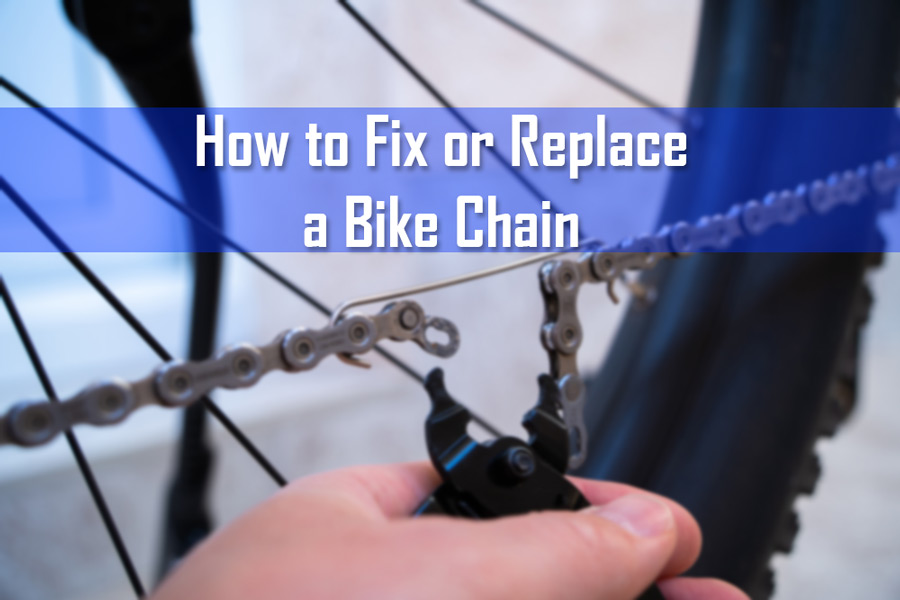
How to Fix a Bike Chain — Replace & Resize a Bike Chain Easily
Replacing your chain at the right time will prolong the lifespan of your whole drivetrain and prevent loss of efficiency, allowing you to get the most from your rides.
Knowing how to fix a bike chain and replace a worn one will allow you to save money on mechanic fees and save time going to and from the shop. Thankfully, the process is relatively quick and straightforward.
This article will cover checking your chain for wear, repairing and replacing it, and fixing some common problems.
Why and When You Should Replace a Bike Chain
Why replace your chain? Well, wear is an inevitable part of riding a bike. Over time, the chain, cogs, and chainrings wear down because the drivetrain has many moving parts and almost all pedaling force transfers through it.
The process starts with a loss of efficiency through extra friction in the system, followed by the chain beginning to skip and jump. Meanwhile, the chain is wearing down the cassette and chainring at a growing rate.
If you often climb and/or ride out of the saddle, you may need to replace your chain more often.
The rule of thumb for replacing a chain is to do it every 2,000 miles as a part of basic bike maintenance. Ideally, check for wear manually at 500-mile intervals. This 2,000-mile estimate is very rough, and mileage will vary significantly between chains and riders.
The quality of products differs, and riding styles affect how fast it wears. Extend your chain life with regular cleaning and lubing of the chain and drivetrain, riding with a high cadence, and avoiding cross-chaining by shifting gears properly.
Bike Chain Sizes Explained — How to Get the Right One?
Chains are designed to match the number of cogs on your cassette, meaning they are speed-specific.
For example, if you have an 11-speed cassette, you will need a corresponding 11-speed chain. This sizing relates to the width of the chain; an unmatched chain will rub off the cog inside the one where it is sitting.
The more gears a chain is designed to work with, the narrower its width is going to be. That’s why a 10-speed chain will not fit on a 12-speed cassette even if the length is right.
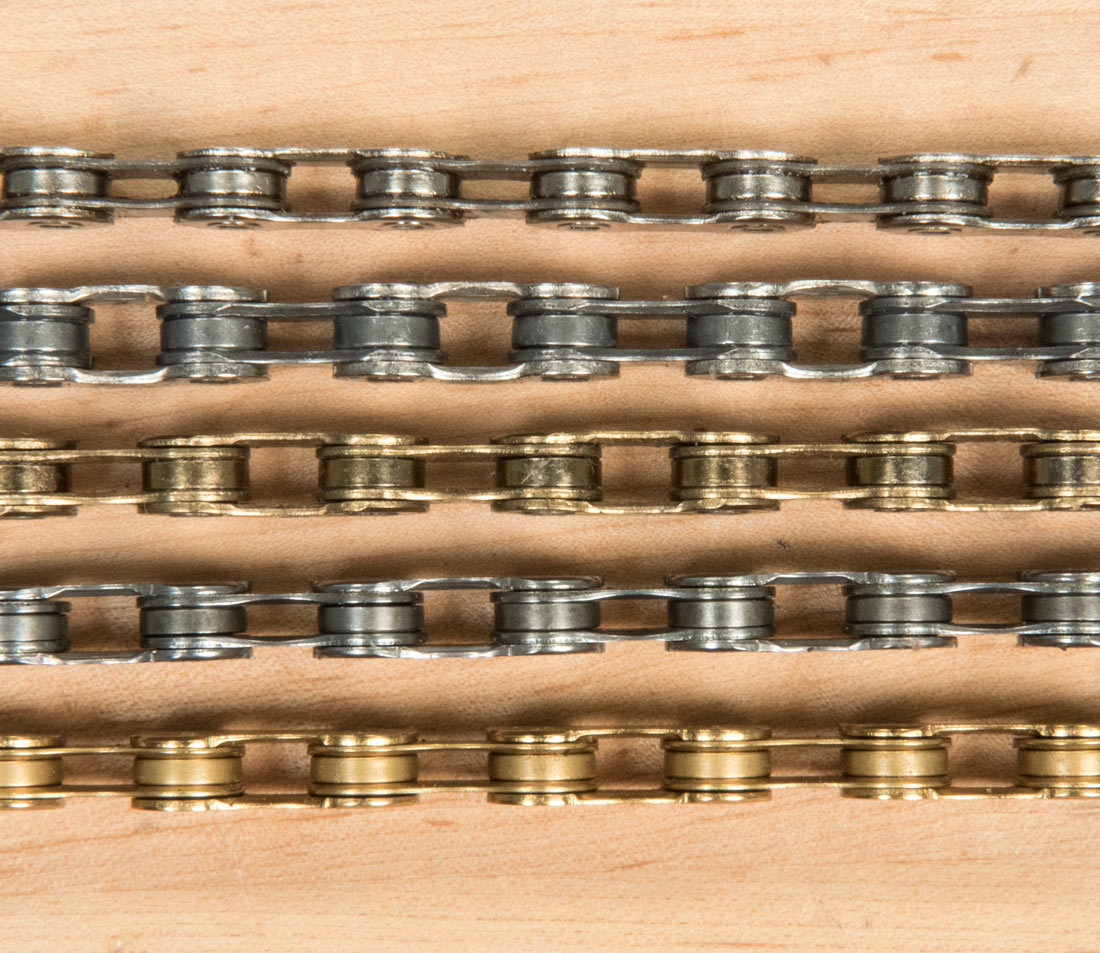
Different bike chain widths show why you need a specific size for your drivetrain. | Image source: parktool.com
When choosing a replacement chain, it’s best to go with the one that came with your bike originally or one from the same manufacturer. However, if this isn’t an option, the major brands are generally cross-compatible, as long as the speeds match (6,7, and 8-speed chains are interchangeable).
Like all bike components, there is a wide range of prices for chains; high-end chains are usually lighter and more durable.
How to Measure Chain Wear?
The best way to measure chain wear is to use a chain checker tool. These are cheap and simple devices that can tell you if it’s time for a replacement based on how stretched your chain is. Alternatively, you can measure wear with a ruler or pull it with your fingers.
Method 1: Use a Chain Wear Tool
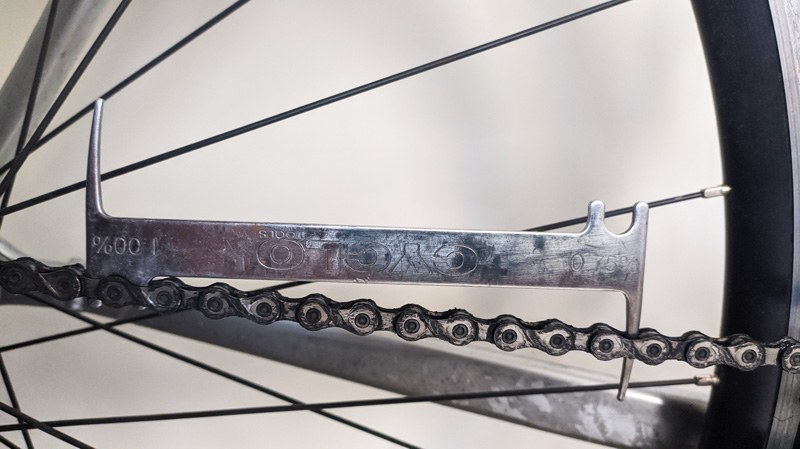
A basic bike chain wear tool showing 0.75% and 1% wear points.
Using a tool is the quickest and easiest way to measure wear. First, take your checker device (a long thin piece of metal with hook-like protrusions), attach the hook to a roller, then allow the other end of the device to rest either into the gap between the rollers or on top of the chain.
- Related: Shop Chain Wear Tools on Jenson USA
Generally speaking, 11-speed and 12-speed chains should be replaced at the 0.5% wear point. The 0.75% is the suggested replacement point for 10-speed and 9-speed chains; whereas the 1% wear point is when you should replace your 8-speed and lower chains.
If you wait for too long (0.75% on 11 and 12-speed chains or 1% on 10 and 9-speed chains), you may also have to replace the cassette and chainrings to ensure proper shifting.
Method 2: Measure with a Ruler
The second best way to check the chain for stretch is to use a ruler or measuring tape. For example, a new chain will measure 12 inches (304.8mm) across the length of 12 links. Pull the chain tight and start your ruler in the middle of a pin to measure.
Then, check where the 12-inch mark on the ruler lies. If those same 12 rivets measure 12 1/8th inches (308mm) or greater, you must replace the chain.
Method 3: Pull with Fingers
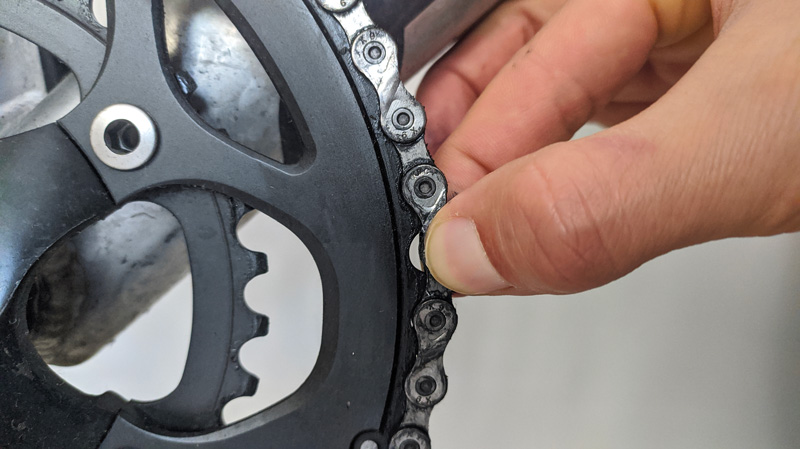
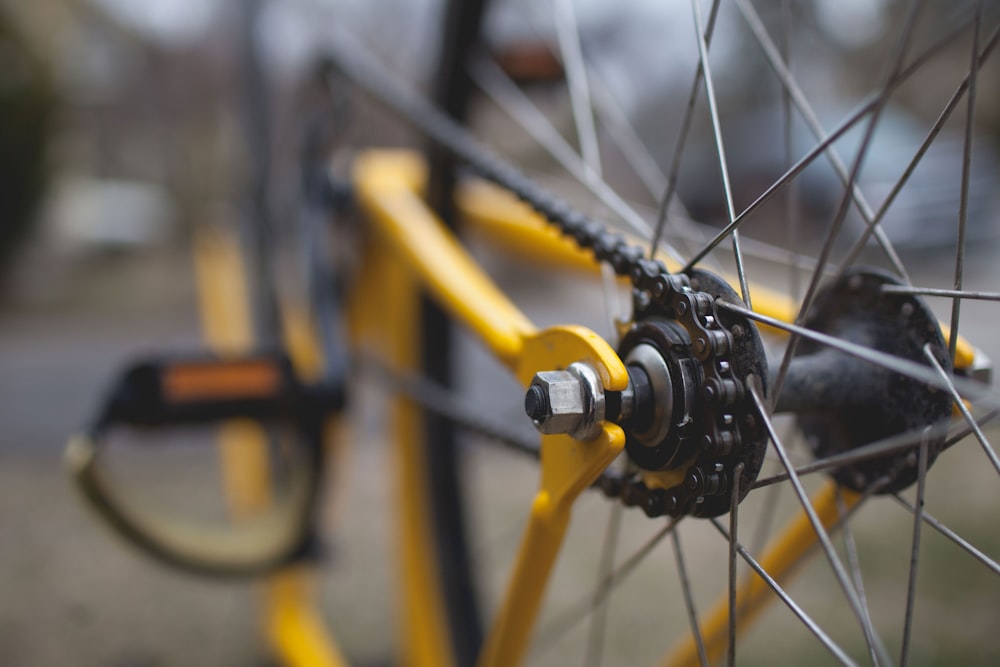
Pull the chain at the 3-o’clock position while in the big chainring and the biggest cog on the back. The chain in the photo has plenty of life in it.
To set up, put your chain on the largest chainring. Then, use your fingers to pull the chain away from the chainring, gripping it around the three o’clock position. There should be a tiny gap between the chain and chainring when you pull it.
A worn chain will noticeably pull away, allowing a clear view between the chain and chainring. This tool-free approach is not very accurate, but it will indicate when to check wear with a ruler or chain checker.
How to Fix a Bike Chain or Install a New One
This section will cover how to fix a chain on a bike by replacing the old one. In addition, it’s helpful to know how to fix a broken bike chain when you’re out riding. This process involves taking the broken link off the chain and reconnecting the two ends with a spare master link or pin, covered in steps two and four.
If you use a pin to rejoin it, your chain will be too short and require replacing once you get home. Conversely, a master link fix adds another full link and restores the chain to the appropriate length.
Tools you will need:
- Chain tool
- Master link pliers or pointed pliers (if your chain has a master link)
- New chain
- Lube (if using a new connecting pin)
Step 1: Remove the Old Chain
Before beginning, shift your chain onto the smallest cog and smallest chainring. Once in place, check your chain for a master link and take a photo of the rear derailleur for reference when routing the new chain later.
If there is a master link, run it through until it sits on the lower stretch of chain that connects the rear derailleur and chainrings. Then, take your pliers, insert them into the chain around two rollers of that link, and close the pliers to release the lock.
If your chain comes with a master link, removing it will be a lot faster and easier.
For chains without a master link, take your breaker tool and place the lower stretch of the chain into the slot on the device. Next, align one of the chain’s pins with the tool’s driving pin, twist the handle clockwise until it pops out the other side, break the chain, and carefully remove it from your bike.
Note: this is an excellent time to deep clean your cassette if you have time.
Step 2: Sizing Your New Chain
There are two methods of sizing a chain. The easiest is to compare old and new by laying them out side by side. When doing so, ensure the links line up along the length of both, giving you an accurate picture of how many links you should remove from the new one (they usually arrive too long). Next, mark the matching pin and break off the extra links using your chain tool.
The alternative way involves shifting your front derailleur to the bigger chainring and running the new chain around the big chainring and the largest cog at the back (don’t involve the rear derailleur yet). Then, pull the two ends together underneath until they meet. Allow them to overlap two whole links and the half-link on either side. Finally, remove any extras, and your chain will be ready to install.
Step 3: Routing the Chain
Before installing your chain, ensure the side with printing is facing out toward you as some chains are directional. If your chain uses a connecting rivet, lead with the side of the outer cage plate through the rear derailleur. Master link chains have inner cage plates on either end, so this is irrelevant.
Route the bike chain properly by guiding it over the cassette, under the top pulley and over and around the bottom pulley.
Begin routing by feeding the chain over the smallest rear cog. Once over the cog, pass it back across and over the higher wheel, then down and back and across the top of the lower wheel in an S-like shape. This part is tricky, so take your time and refer to the photo you took if necessary. Additionally, pay attention to any cages in the rear derailleur and make sure the chain runs inside them.
The other side of the chain goes inside the rear triangle, through the front derailleur, and across the small chainring. Once routed correctly, bring the two ends of the chain together to meet in the middle of the bottom run.
Step 4: Connecting the Chain
Again, there are two methods of connection based on if you have a master link or not. If you have one, ensure the arrow printed on the outer plate points in the direction the chain will run. Next, attach the two plates from the new master link onto the ends of the chain and connect them.
Finally, lock it fully by opening the handles of your pliers outwards (the reverse of how you opened it). Alternatively, hold the rear brake and turn the crank to create tension; this also locks the master link.
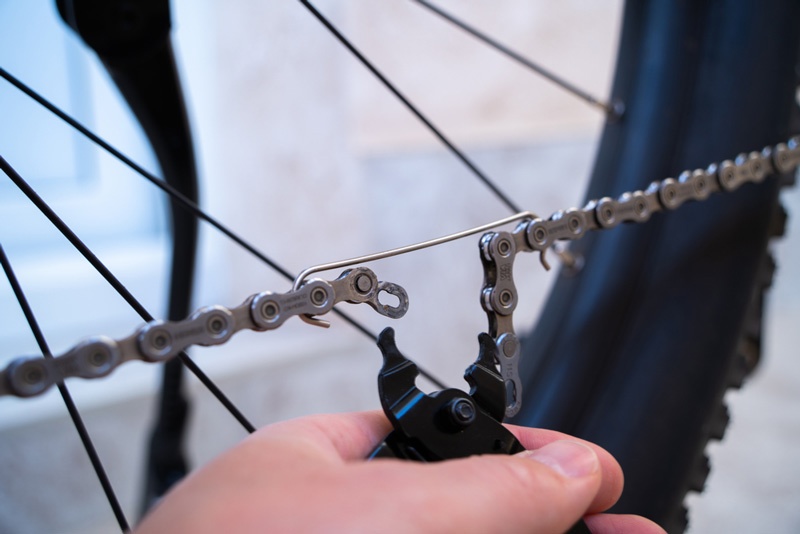
Use a short piece of wire or an old spoke to keep the chain in place while you’re connecting it with the pliers.
For chains that use a connecting pin, align the two opposing ends. Then, take your new pin (it must correspond to the chain model), add a drop of lubricant, and push it into the hole with your fingers from the inside out toward you.
Once you meet resistance, use your chain tool to drive the remainder of the pin into the chain, ensuring it matches the ones on either side. Finally, use your pliers to break off the protruding tip.
Step 5: Inspect the New Chain
Once connected and in place, backpedal and look for any stiff links (this is common with new chains) and, with your hands, lightly flex the chain from side to side to loosen tight ones. Finally, if a new chain continues to skip and jump, your cassette and chainrings will likely require replacing.
Solving Common Bike Chain Problems
How to fix a broken bike chain?
To fix a broken bike chain, first, identify the broken link. For connecting rivet chains:
- Ensure you have two matching ends, one inner and one outer plate.
- Remove the broken links with your chain tool.
- Take your new pin and install it with your chain tool, pushing it toward you from the inside of the chain. Once installed, break off the tip with the pliers.
Repair master link chains:
- Ensure both ends are inner plates so you can fit the master link.
- Place on the side of the new link into each end and push together.
- Lock the master link into place by holding the rear brake and pressing on the crank to create tension.
How to tighten a bike chain?
Single-speed bikes typically have adjustable dropouts that allow you to easily adjust chain tension.
Bikes without derailleurs like BMXs rely on sliding dropouts to manage chain tension. So if your chain is loose and starts slipping off the plates, you can tighten it in four quick steps.
- Rest your bike upside down.
- Loosen the rear wheel bolts.
- Pull the wheel back to put more tension in the chain (about a half-inch or less of movement on either side) and hold the wheel in place.
- Retighten the wheel bolts.
In case your bike doesn’t have adjustable dropouts, you can tighten a bike chain by taking it off, removing a certain number of links to shorten it, and then connecting it back together.
How to fix a loose bike chain?
A loose bike chain could be a symptom of three different issues.
- It is excessively worn and needs replacing. Chains stretch as they wear, which results in extra slack and problems with skipping between gears.
- The chain is too long, and you must remove a link. This problem isn’t likely if the chain has been sized correctly (see step two above).
- The derailleur isn’t taking up the slack and may need adjusting or replacement; another uncommon issue that sometimes occurs with older drivetrains.
How to fix a bike chain that fell off?
To fix a bike chain that fell off, start by turning it upside down to rest on the saddle and handlebars.
- Push and hold the rear derailleur forward to put extra slack on the chain.
- Then, take the chain in your other hand and hook it over the chainring (the one the derailleur is set to if you have multiple chainrings).
- Once 30-50 percent of the chain is resting on the teeth, turn the pedals one rotation, and the rest of the chain’s teeth will lock in place.
Related
Shop Bike Chains on Jenson USA
Groupset Overview: Shimano, SRAM, Campagnolo, SunRace, microSHIFT
Share this on: