Easy DIY Bike Fit: 4 Areas to Improve for a More Comfortable Ride
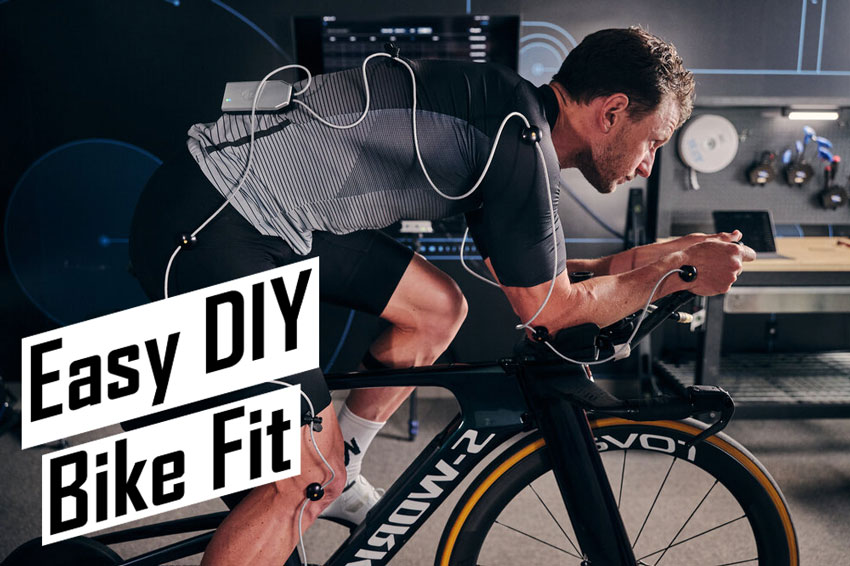
Image: retul.com
Before you begin riding your new bike, or before doing a long ride of any kind, it’s essential to perform a basic DIY bike fit.
Making a few adjustments at home will allow you to get out on the road or trail and enjoy your new purchase without having to deal with pains and aches.
You can start riding in relative comfort by installing and aligning your cleats (if you use them), setting your saddle position, modifying the reach if necessary, and adjusting your cockpit.
If you plan on riding a high number of miles, it’s vital to spend time tweaking each area of your bike, so you avoid pain and maximize your performance.
Alternatively, visit a professional bike fitter to save yourself the headache.
Why Is Bike Fit So Important?
Knee, back, and wrist pain are common issues of poor fit. They can often be addressed through slight modifications to your position on the bike. However, minor pains can develop into longer-term injuries if you fail to fix them.
A good bike fit is essential for anyone who rides frequently. If your bike doesn’t fit or is poorly adjusted, pain or injuries will likely arise over time.
Another reason to prioritize bike fit is optimizing efficiency and comfort. Whether pain arises or not, a well-fit bicycle will allow you to maximize power output and make it possible to ride for long durations without numbness or discomfort.
Now, let’s look at four key DIY bike fit adjustments to make when you get a new bike.
Easy Step-by-Step DIY Bike Fit
It’s important to mention that a DIY bike fit will never emulate a professional fitter’s attention to detail and personalization.
While many cyclists can ride happily after an at-home fitting, it’s common to experience issues at some point in time, be it numbness in the hands, wrists, or feet, knee pain, back pain, or saddle soreness.
If you’ve performed a bike fit at home and problems like these arise and persist, save yourself the pain or possibility of long-term injury and get a professional fitting.
It’s also important noting that a bike fit is not a do-it-and-forget-about-it kind of thing. Minor tweaks likely need to be performed at regular intervals, as our body’s flexibility changes (for better or for worse).
Record Yourself Riding
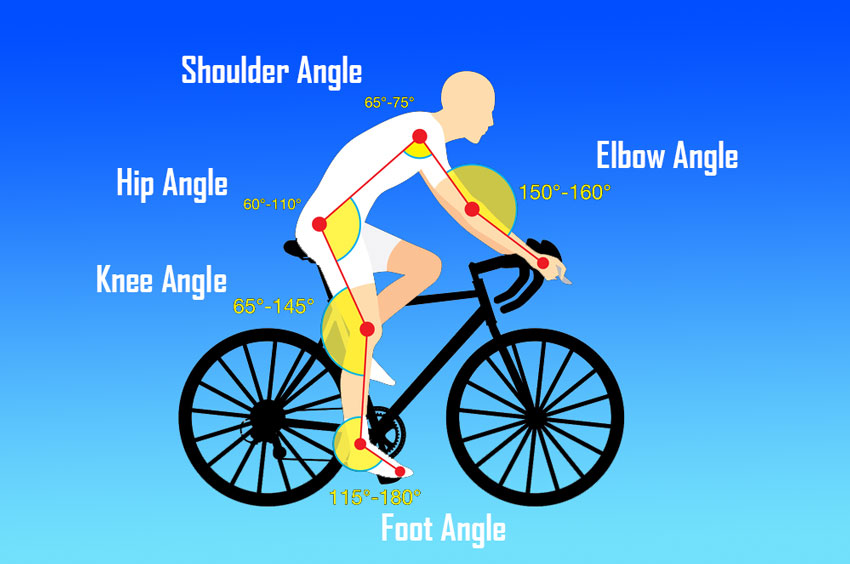
Before starting your bike fit, taking a side-on video of yourself riding at a typical power output for a few minutes is invaluable. Of course, you’ll need an indoor trainer to do this.
With this footage, you can make more precise and relevant adjustments. For example, pay attention to your saddle height, the angle of your hips and arms, the degree of flexion in elbows and the knees throughout the pedal stroke, and back shape.
1. Adjusting Your Cleats
When performing a bike fit at home, professional fitters recommend you start by setting up your bike shoes. If your cleats aren’t set up correctly, they may throw off a subsequent measurement.
Incorrect cleat position is one of the most common causes of cycling knee pain, and it can also cause foot numbness or pain between the toes.
-
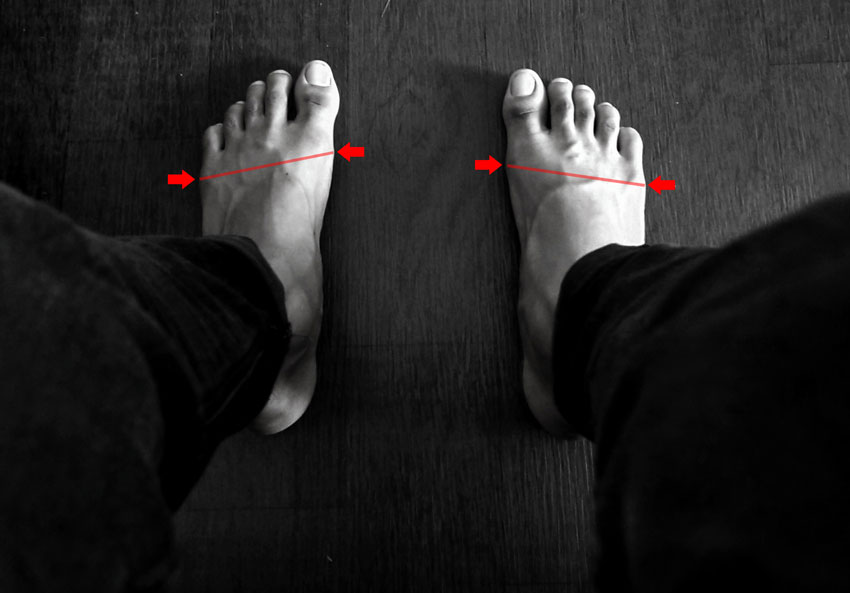
Find Your Natural Foot Position

Image: bikeradar.com
First, identify how your feet rest by sitting on the edge of a countertop or table with your feet hanging, not touching the floor. Next, note the angle at which your feet rest (straight or pointed slightly out or inward?) Then, try replicating that angle with the position of your cleats when installing them on the shoes.
-
Cleat Setup
Put on your bike shoes without the cleats installed. Then, identify the joint line where your big toe connects to the rest of your foot (the ball of your foot) and mark the corresponding point on the shoe using tape or a marker.
Next, remove the shoe, place it on a flat surface, and use a business card to draw a straight line vertically down from the mark to the sole.
Clipless vs Flat Pedals: Is a Flat or Clipless Pedal Better for You?
Then, loosely install the cleats and put the shoes on, clip into your pedals, and align the pedal spindle (axle) with the line on the shoe. Lastly, unclip and tighten the cleats in the appropriate place while maintaining the desired angle.
2. Setting up Your Saddle
When setting saddle height, it’s particularly beneficial to video yourself pedaling so you can fine-tune the position. If you don’t have a trainer, you’ll have to sit on the bike and balance against a wall or table.
-
Saddle Height
The first step is to sit on the bike, put one pedal at 6 o’clock, and place your heel on it. In this position, you want your leg at full extension.
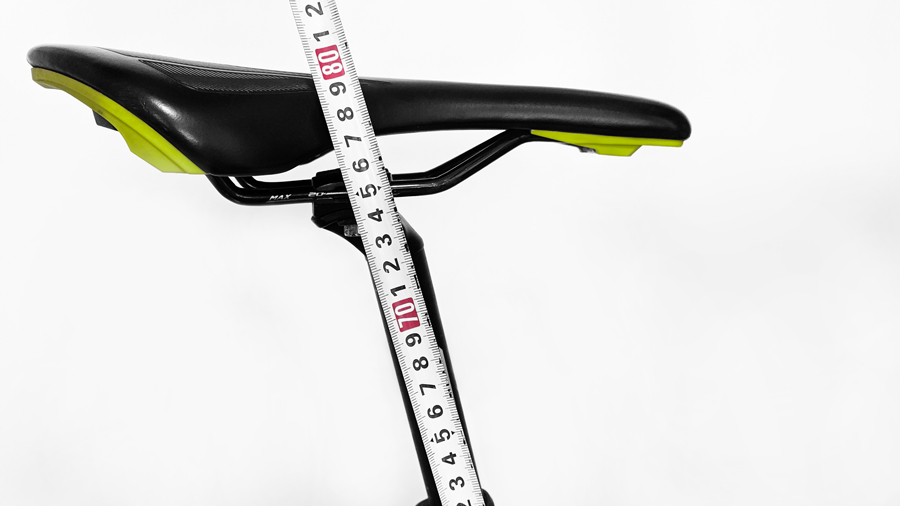
Raise or lower the saddle until your leg is fully extended while in the position mentioned above. Then, when you start pedaling normally, there should be a soft bend in the knee at the bottom of the pedal stroke (roughly 150 degrees).
Lower the height slightly if your hips slide laterally across the saddle at the bottom of the pedal stroke. When watching a recording, the stroke should be smooth without movement in the hips or lower back.
Incorrect saddle height is a common cause of saddle sores; so if you’re struggling with that, it’s a good idea to revise your saddle position.
-
Layback (Fore/Aft)
Next, we’ll identify where the saddle should sit on the rails (layback), hold a piece of string with a weight tied at the end, and sit on the bike. With the pedal at 3 o’clock (horizontal), you want the front of your knee to be directly over the pedal axle.
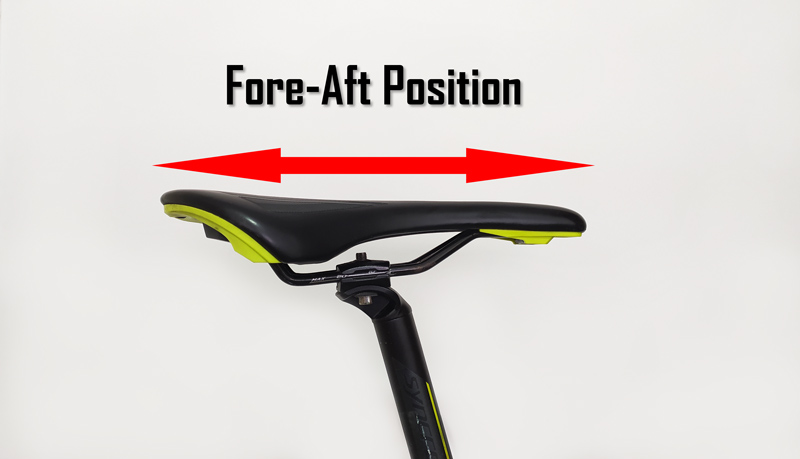
To confirm this, you can drop the string over your knee while maintaining your foot in this position. It should sit just in front of the pedal axle when it comes to rest.
Remember, if you move the saddle back on the rails, you will likely need to drop the saddle height; if you move it forward, you need to raise it.
-
Saddle Tilt
A final adjustment you can make to the saddle position is the tilt. You may want a slight downward tilt if you’re a rider who regularly uses the drops position on a road bike.
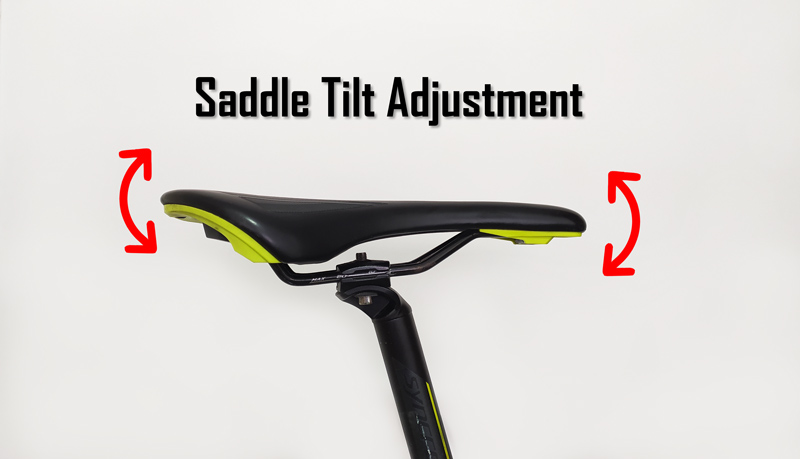
Your bike saddle should be perfectly level to the ground or have a slight forward tilt, based on your preferences.
Doing so relieves pressure on the undercarriage. Mostly, riders will have their saddle horizontal or very slightly tilted down. Experiment with this to see what your preference is.
When adjusting saddle tilt, never do it by more than 1-2 degrees at a time. You can use a smartphone app or a level to measure the tilt correctly.
3. Modifying Reach and Stack
The distance to your handlebars will depend on your flexibility and personal preference. To change the reach to the handlebars, don’t adjust the saddle layback, as this will compromise the pedaling position we’ve just set up.

You want your shoulders and shoulder blades to be in a neutral position when gripping the bars, not extended (handlebars too far) or retracted (too close). In addition, you want a relaxed elbow position with a soft bend, not locked out. A rough guide for finding the correct reach is to have your hip angle at 45 degrees and your arms at 90 degrees from your body in a side-on view.
How to Measure a Bike Frame — Our Easy-to-Follow Guide
Changing your stem length or adding/removing spacers from the headset can increase or decrease the reach. Doing so will require purchasing a new stem or extra spacers (if adding them) from your bike shop.
Another way of changing reach and drop is by adjusting the angle of the handlebars or experimenting with different types of road bike handlebars, which we cover in the next section.
4. Setting up Your Cockpit
Cockpit modifications help put some finishing touches on a DIY bike fit, fine-tuning how the bike feels to ride.
-
Handlebar Angle
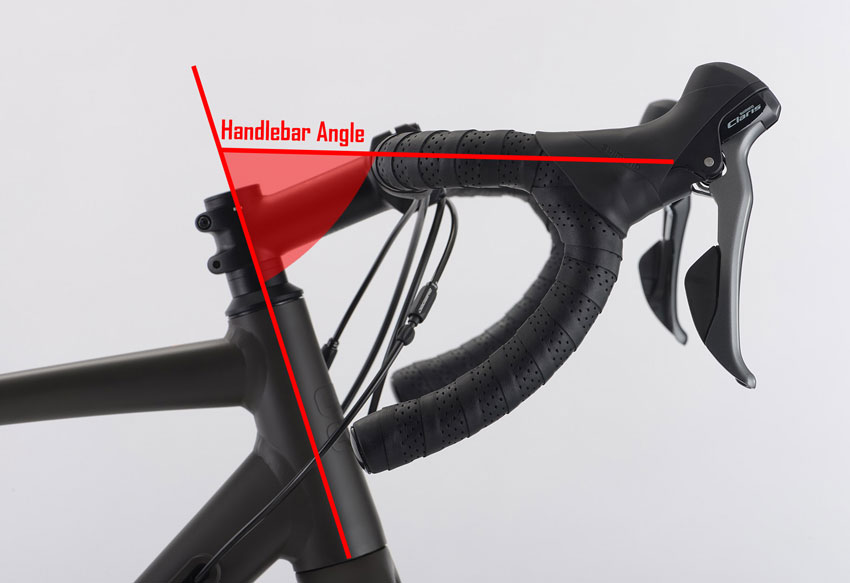
Changing the handlebar angle can help you become more comfortable or aerodynamic. However, ensure the change doesn’t lead to over-extending or bunching of the shoulders. Play around with your handlebar angle if you need to make a slight adjustment to reach but don’t want to replace your stem or change the handlebar height.
-
Hoods Position
On a road bike, changing the position or angle of the hoods is another possible adjustment you can make to the cockpit. Doing this requires removing the handlebar tape and adjusting the hoods, which can be tedious. However, it’s worthwhile if you need slight modifications to the reach or hand position.
-
Brake Lever Reach
Another possible adjustment is the brake lever position. Small screws on the brake lever mechanism will open or close the angle of the levers.
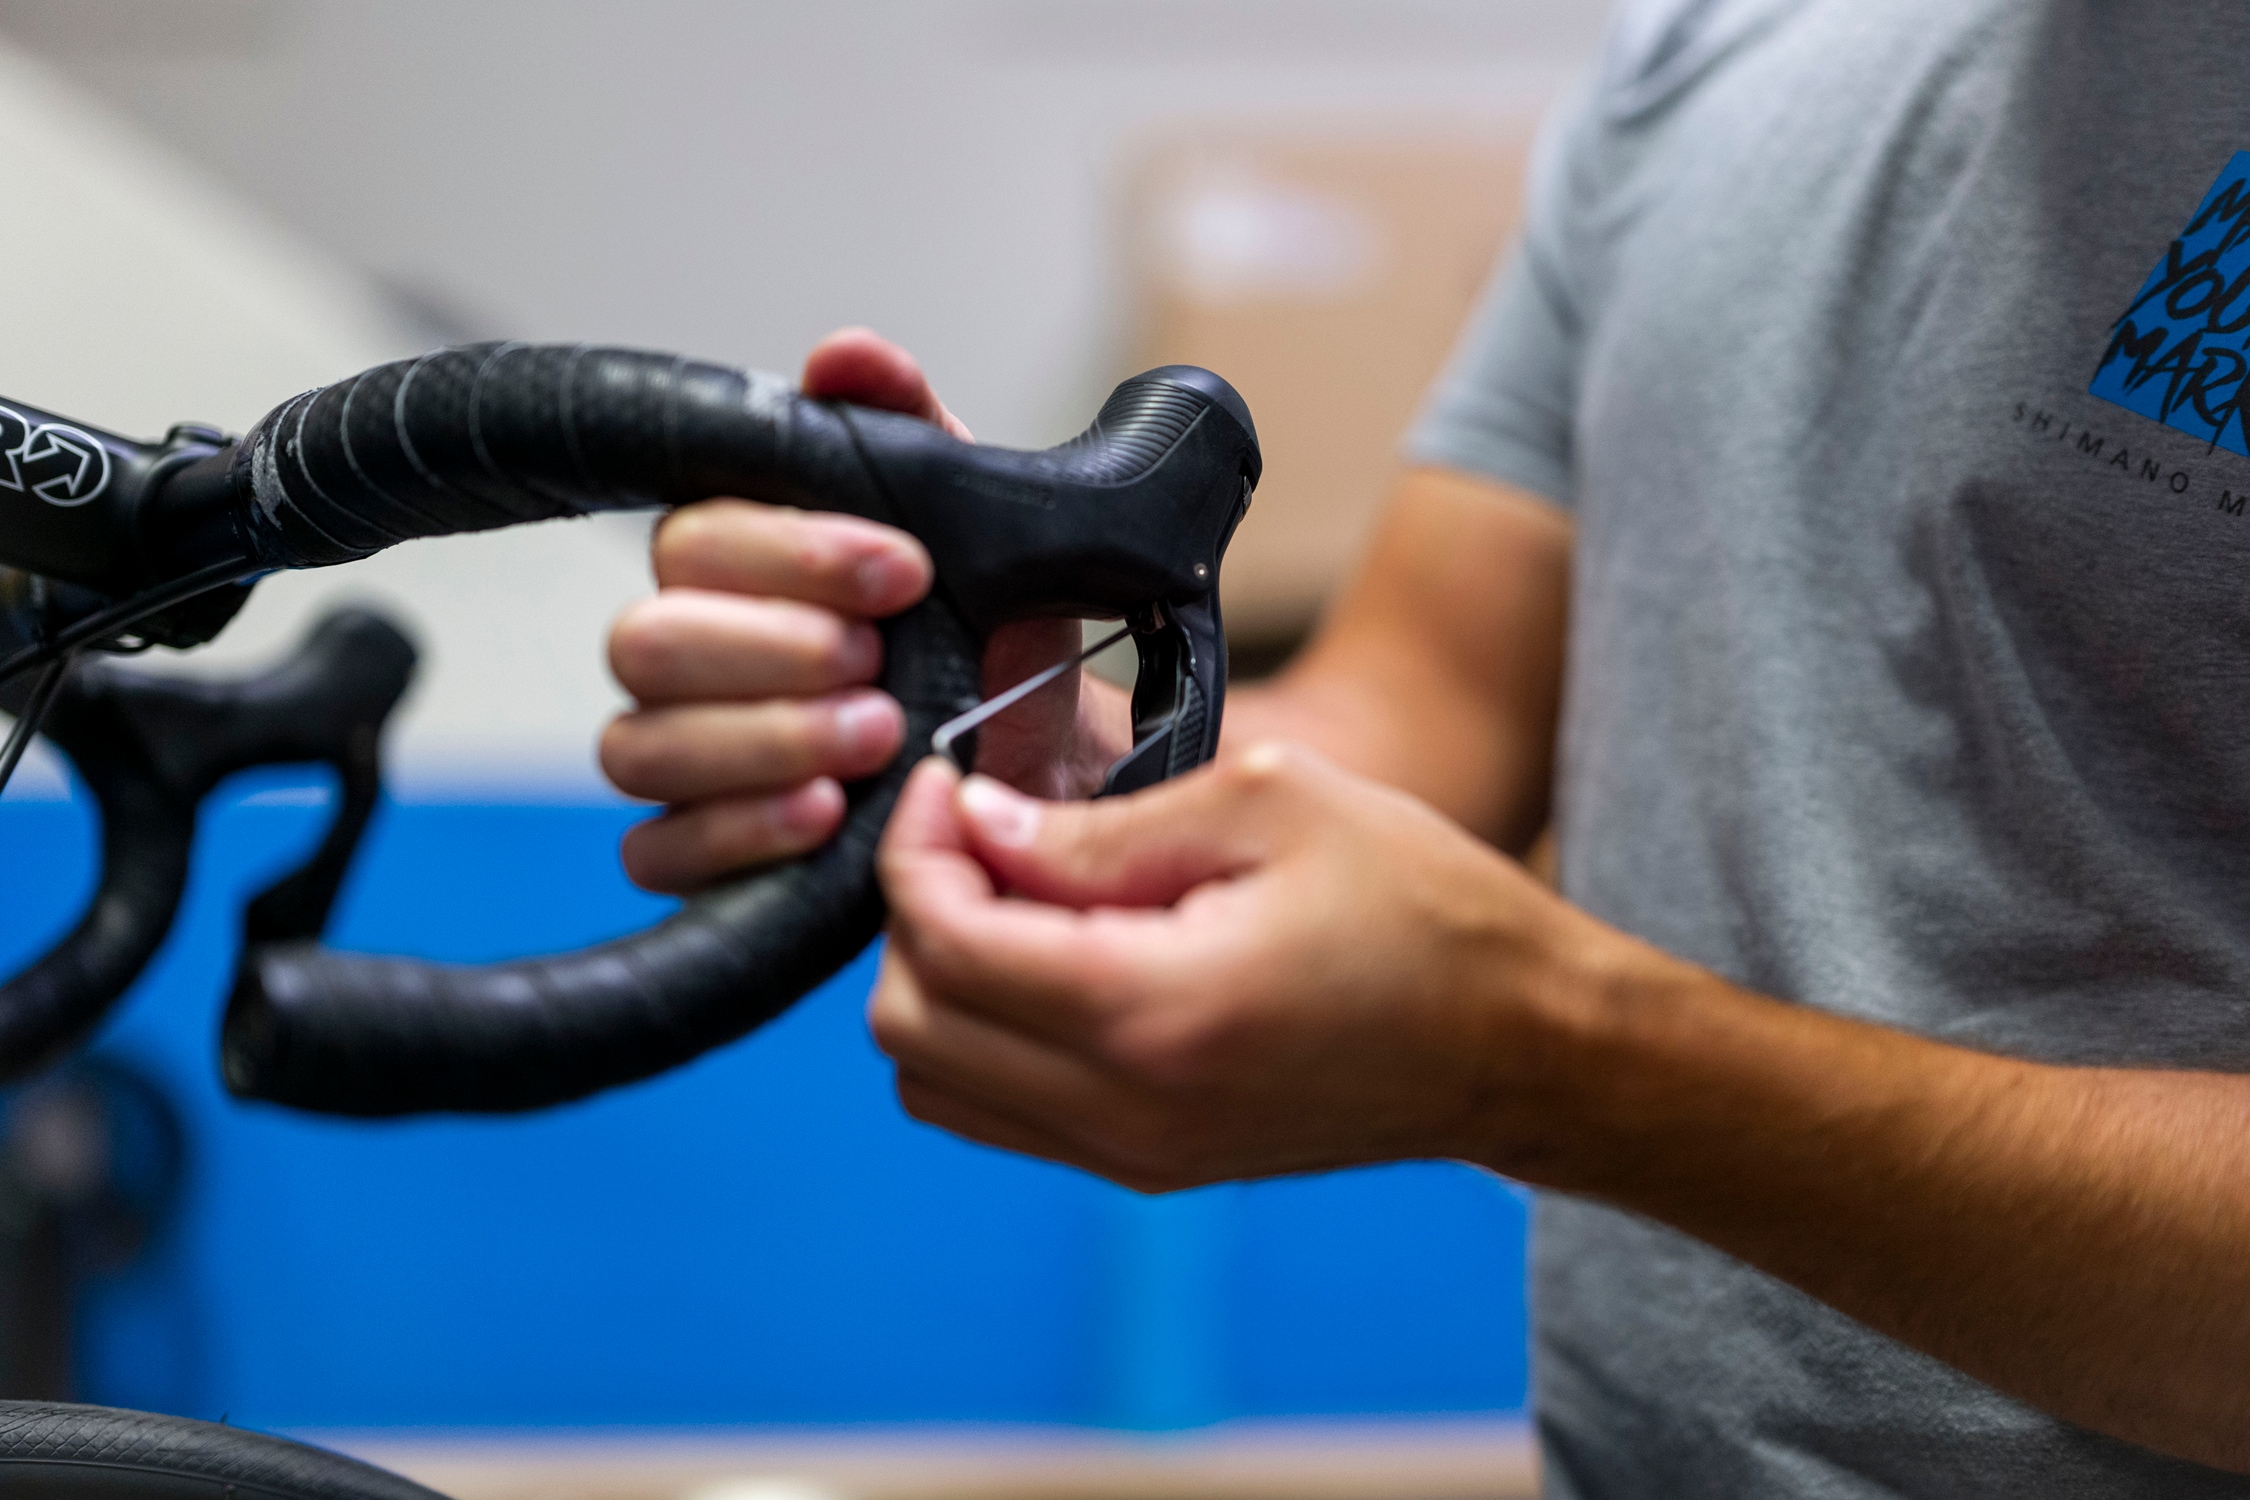
Image: bike.shimano.com
For example, if you have small hands, the standard setting may be too far and compromise your ability to pull the brakes effectively. These screws are usually at the back of the hood on a road bike, covered by bar tape.
Share this on: