New Bike Buying – Importance of Break-in Period – Check-Up, Tune-up
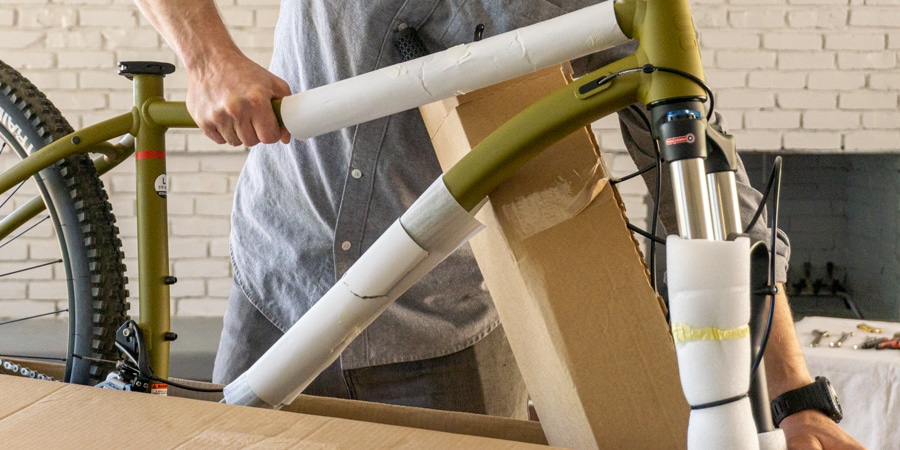
Image source: rei.com
When you buy a new bicycle, there are a few important things to do to ensure it is set up perfectly for the long term.
In this article, we will explain the break-in process step by step, from the date of delivery up until you’ve ridden it for 10 miles or so. Lastly, we will leave you with some advice for long-term maintenance.
1. Receiving the Bike
2. Assembly
3. First 5-10 Miles
4. Re-tighten & Re-tune
5. Regular Interval Bike Maintenance
1. Receiving the Bike
Buying a bicycle online is becoming more common each year, with online retailers offering a much more extensive selection than regular stores and significant discounts and savings.
However, this usually means you have to do the final assembly yourself. Therefore, knowing what to do when your new bicycle arrives is vital for long-term success.
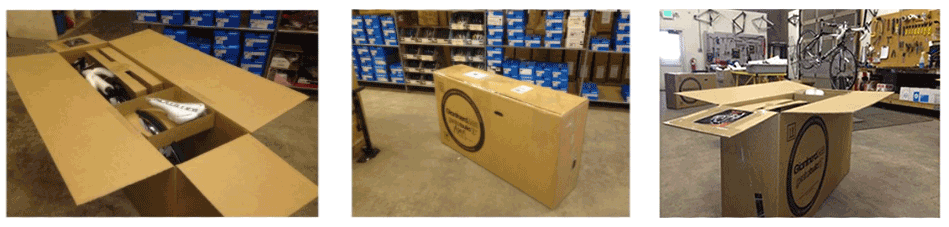
When your new bike arrives, it will come in a big cardboard box. Ensure the box is upright before you open it, removing the staples with a screwdriver. Then, carefully open the box, removing the bike piece-by-piece (the front wheel and handlebars are usually separate).
Most bicycles ordered online come 85-95% assembled!
Make sure the box is empty of small parts, and then keep it to the side with all the protective packaging in case you need to return it.
2. Assembly
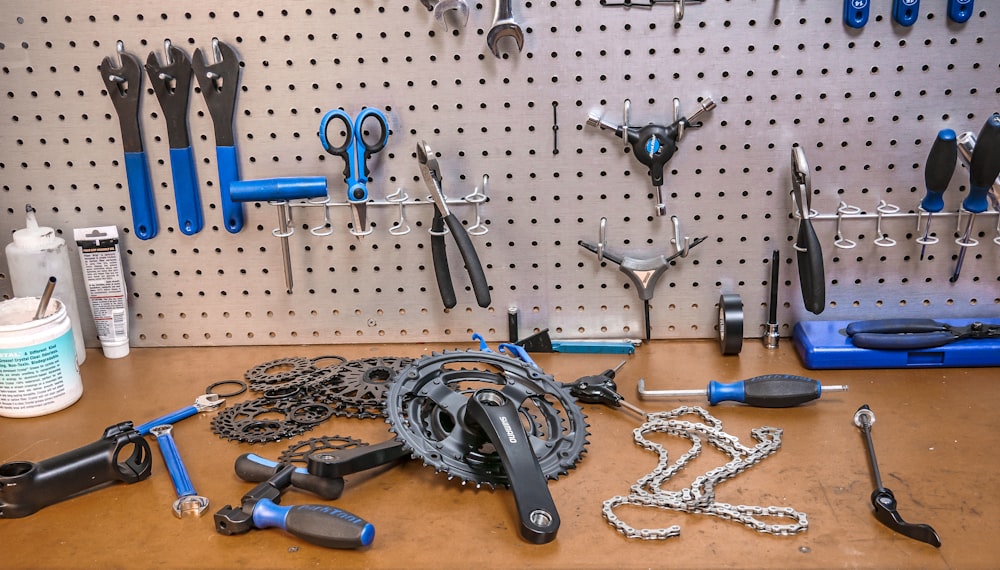
Make sure you have the bike’s user manual and your tools ready before assembly starts. Some manufacturers supply the tools needed for assembly. Otherwise, the tools required can vary depending on how much assembly needs to be done. The most common tools include:
- Hex keys
- Bike grease
- A pump
Another handy tool is a torque wrench, especially for carbon bikes. This tool helps you tighten each bolt to the ideal torque, eliminating the chance of damage caused by over-tightening. Carbon paste is also needed in the assembly where carbon meets carbon or metal instead of regular bike grease.
Before starting, open your manual to step one and read the instructions, using this guide as further support.
The Seat post

Useful, but not necessary – A torque wrench
Firstly, rub a small amount of bike grease/carbon assembly paste inside your seat tube. Then, insert your seat post into the seat tube, tightening the corresponding bolt with your hex keys or torque wrench.
Do not tighten anything very hard, just enough to secure the bolt without slipping. Finally, clean any excess grease with a fresh cloth.
The Handlebars & Stem

Depending on the type of handlebars your bicycle comes with, this process can vary quite significantly. Check your user’s manual for the step-by-step guide on this process and follow it accordingly.
Always ensure your stem is aligned with the front wheel and the handlebars are centered using the lines on the bars. Tighten each bolt to the force indicated in the manual when possible.
Keep in mind:
- There are generally three bolts that need to be tightened on the stem and head tube.
- The single bolt in the middle of the stem needs minimal tightening, as the two bolts on the side of the stem are what keep the front end together. To find the right amount of torque, you can carefully sway the front end side to side after you’ve tightened the two tightening bolts to see how easily the front end movies. If it doesn’t move freely, slightly loosen the center bolt; if it moves too fast, tighten by a quarter turn and re-tighten the whole thing.
The Wheels
There are two common ways to install wheels on a bike, and it depends on the type of wheel you have.
Quick-release skewers are the most common way to attach a front wheel. They offer tool-free attachment where the skewer runs through the wheel’s hub.
There is a nut on one side and a lever on the other, with a spring between each lock. This skewer requires U-shaped dropout slots (openings at the end).
Thread the skewer through the hub and screw on the locking nut. Once on, place the wheel into the dropout slots, ensuring the wheel is aligned evenly. Then, turn the lever until it is tight, and flip it inward, aligning it with the dropouts.
The other type of wheel is a thru-axle with holes instead of slots at the end of the dropout. The axle itself is a pin that has a thread on one end. Because there are no slots, you must remove the axle if you want to remove the wheel.
Install the thru-axle similarly, putting the wheel into the dropout first (with disc brakes, ensuring that the rotor goes into the caliper), then threading the thru-axle into the dropout holes and tightening with the lever.
Finally, inflate your tires to the recommended pressure on the tire wall.
Add or Change Pedals
If you want to install your own pedals on your new bike instead of the stock ones, you will need a hex key or a 15mm spanner.
The pedals should be marked left and right, so you know where each goes. Next, apply a little grease to the threads and tighten the pedals.
NOTE:
- Right bicycle pedals are tightened clockwise.
- Left bicycle pedals are tightened counter-clockwise!
Adjust the saddle height and perform safety checks
Use our guide to find the correct saddle height for you. Then, before you head out on your first ride, perform these key safety checks.
3. First 5-10 Miles
Your first ride on your new bicycle should be a slow test ride to ensure everything is working correctly. Save the high-intensity or long-distance rides for later.
Go for a ride of about 5 to 10 miles in length, ensuring you have all of the tools you need to make minor adjustments. Get used to the new bike’s geometry, handling, and personality, while keeping on the lookout for any loose or clunky components.
4. Re-tighten & Re-tune if Needed
Once you have taken your new bicycle on a break-in ride, there will likely be a couple of adjustments to make.
Firstly, re-tighten loose components using a torque wrench to meet the manufacturer’s recommended tension.
Secondly, the cables will likely stretch after the first few miles and require adjustments to restore perfect braking and shifting of gears. This adjustment is best done by a professional at your local bike store.
Lastly, your gears may need to be indexed or the derailleur re-tuned if the problem with shifting continues after the cables are fixed. If so, follow this quick video to tune your bike’s gears.
Components to check after the first break-in period:
- Cassette
- Crank
- Head tube
- Spokes
5. Regular Interval Bicycle Maintenance
Regular maintenance is vital to ensure that your bike works efficiently for each ride and so each component lasts as long as possible. Doing so will save you time and money in the long run.
Tire Pressure – Check your tire pressure before each ride to ensure it is within the recommended range (indicated on the tire wall).
Chain – Clean and grease your chain at regular intervals (every 2-4 weeks) to keep it running smoothly and without noise.
Cleaning – Clean your bike regularly to stop dirt from accumulating in areas that can cause problems.
Check out our article for a more detailed breakdown of basic bike maintenance.
Conclusion
Setting up your bicycle correctly from the start will save you a lot of headaches in the future. Take care during assembly, and ensure your bike is adjusted correctly following your first break-in ride. If you have any doubts, always take your bike to a professional for tweaks to make it safe to ride.
Share this on: