Best Electric Bikes for Kids in 2026: Best Choices for All Ages
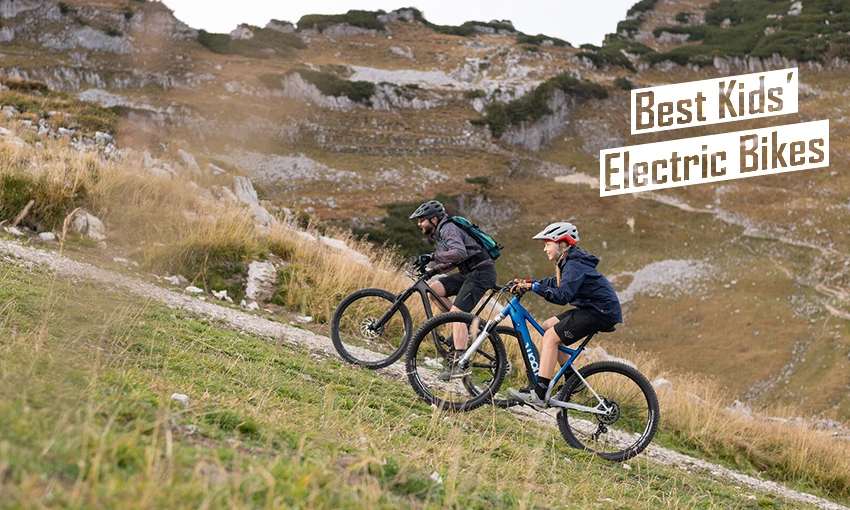
Image source: woom.com
The best electric bike for kids is one that maximizes fun while keeping the ride safe, stable, and easy to control.
Many of us remember our first time on a bike, which is why it’s so important for your child’s early cycling experiences to be positive. A good first ride can spark a lifelong love of biking.
If your kid wants to climb hills, explore longer routes, or join you on weekend rides, choosing the right e-bike makes all the difference. The right model boosts confidence, increases enjoyment, and helps you share more adventures together.
In this guide, we’ll highlight the best electric bikes for kids available today and share essential tips to keep your young rider safe, comfortable, and excited to hit the road.
How to Choose the Best Kids’ Electric Bike
Should You Get an Electric Bike for Your Child?
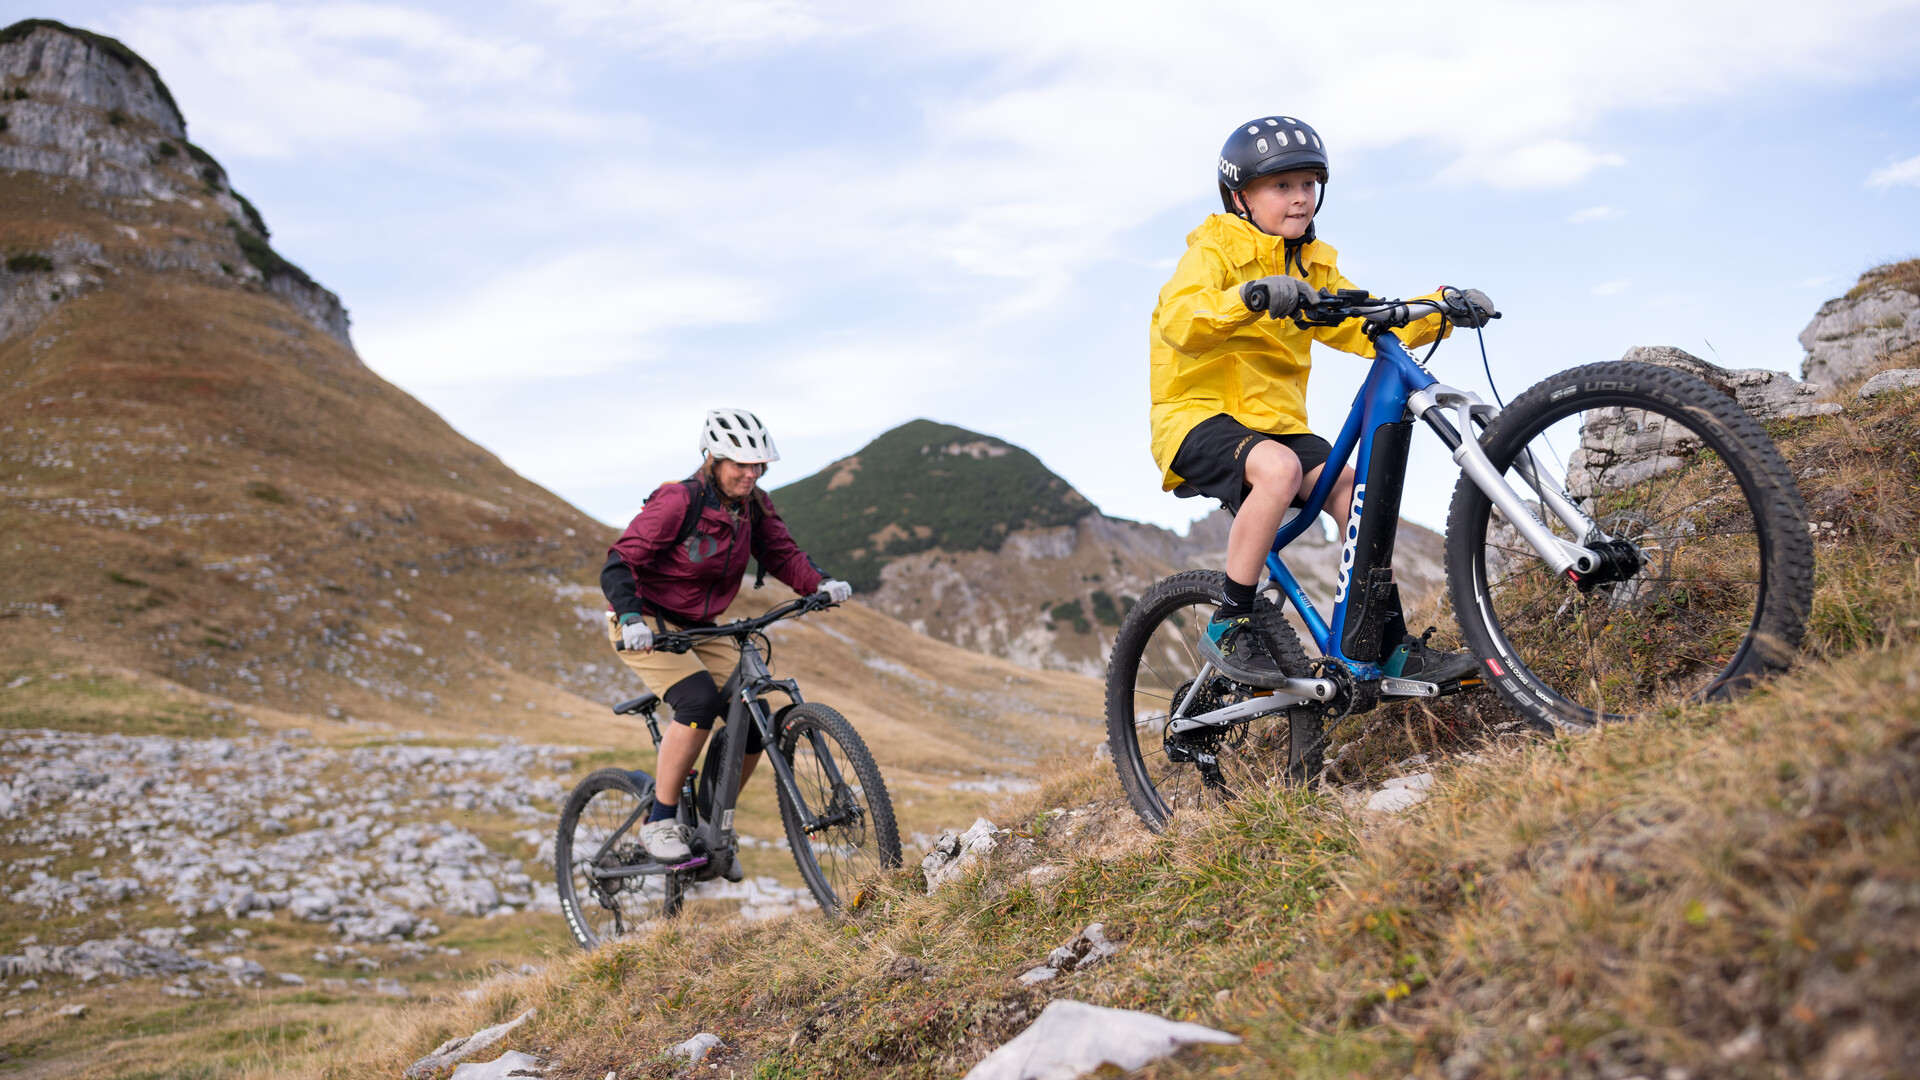
Image source: woom.com
For cycling parents, finding the time to ride with their kids while also doing their own rides can be challenging.
To address this, consider providing your child with the capacity to tackle difficult rides, cover longer distances, and keep pace with you.
This allows them to enjoy the experience without overexertion.
Furthermore, if you reside in a hilly area or near prime mountain biking spots, an e-bike can make riding more accessible for your child.
While kids’ mountain bikes are fun and often affordable, an electric bike might be necessary for some to conquer steep climbs.
Is It Legal for Kids to Ride an Ebike on Public Roads?
It is legal for kids in most states to ride an electric bike on public roads, with a few exceptions.
There are only ten states that prohibit young children from riding an electric bike, these are:
- 14-year minimum: Alaska
- 15-year minimum: Minnesota, New Mexico, South Carolina
- 16-year minimum: Massachusetts, North Carolina, Oregon, Pennsylvania, Washington DC
- 18-year minimum: Hawaii
These restrictions mean children must wait until they are either 14, 15, 16, or 18 to start riding, depending on the state in question.
You can read more about this in our detailed guide to Electric Bike Regulations in the US.
Are E-bikes Safe for Kids?
In general, yes, ebikes are safe for kids. But there are some important safety factors to consider, just as with any other type of bike.
E-bikes designed for children typically have weaker motors than ebikes for adults with speed limiters. They are also usually lighter than standard electric bikes, which reduces the chance of injury and makes it easy for children to maneuver the bike.
As long as your child is confident on their bike and experienced enough to use a regular bike they should have no issue switching to a motor-powered bicycle with the correct speed limitations.
It’s good to know that many manufacturers let you lower or increase the speed limit, allowing you to adjust the top speed based on your child’s riding abilities.
Best Kids’ Electric Pedal Bikes
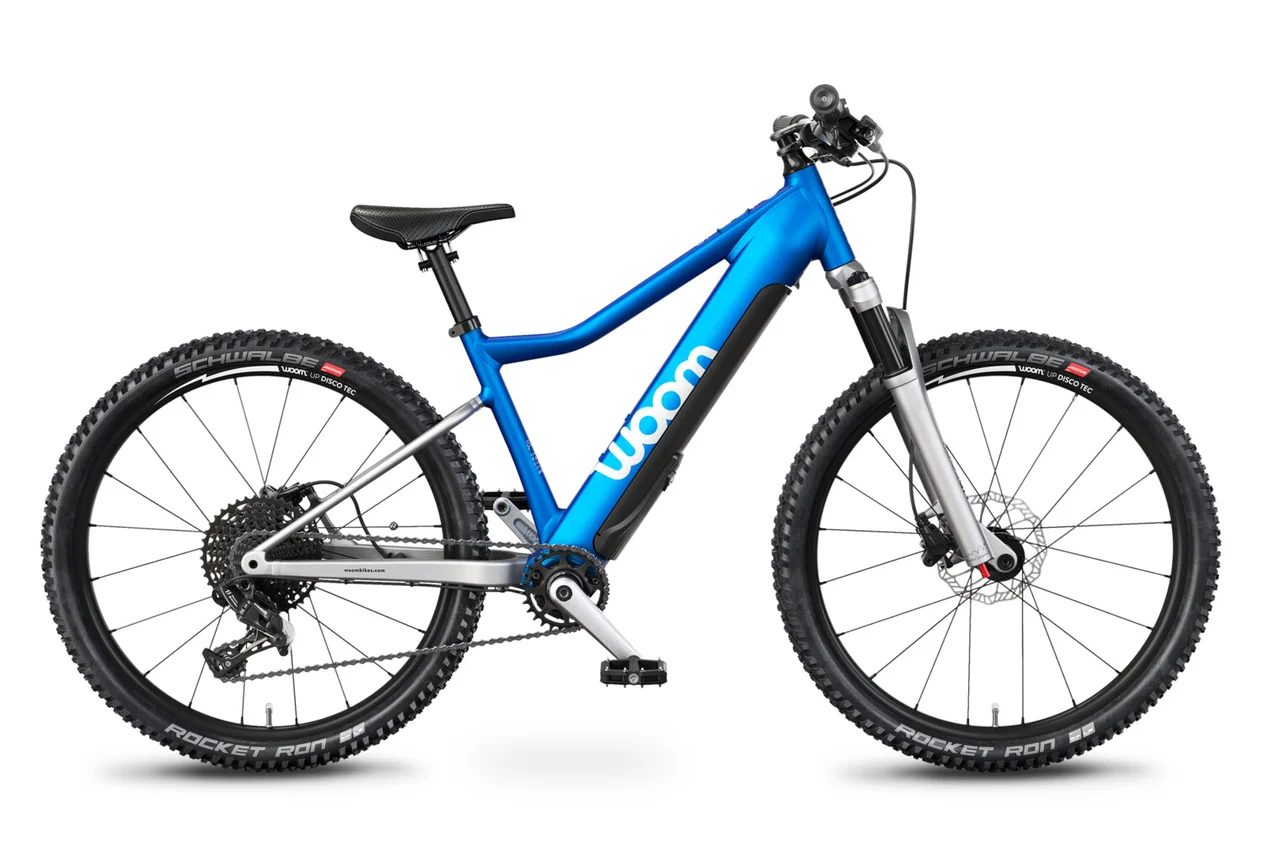
1. woom UP 6

MSRP: $1,999
- Age range: 10-14 years
- Wheel size: 26″
- Motor: 250W motor / 250 Wh battery
- Top Speed: 12 mph
- Weight: 38.3 lb
The woom UP 6 is a hardtail ebike for kids with great off-road capabilities and super smooth power transfer.
Give your kid the ability to keep up on the mountain trails with a premium 250W/55Nm Fazua Evation mid-drive motor. This motor is paired with a 250 Wh battery that provides a decent range for a full day out on the trails. You also get a real trail-ready 11-speed SRAM NX drivetrain seen on real mountain bikes for adults.
This bike is fitted with some important child-specific features, including child-friendly frame geometry and a hydraulic air suspension fork with 90 mm travel for smaller, lighter riders. Additionally, there are ergonomically adapted handlebars and brake levers, and an ergonomically designed saddle to fit children’s biomechanics.
Finally, powerful hydraulic disc brakes by Promax, wide 26 x 2.35″ Schwalbe Rocket Ron tires, and Superlight woom OFF DISCO TEC double-chamber aluminum rims ensure this bike handles perfectly on rough trails.
2. Cannondale Compact Neo
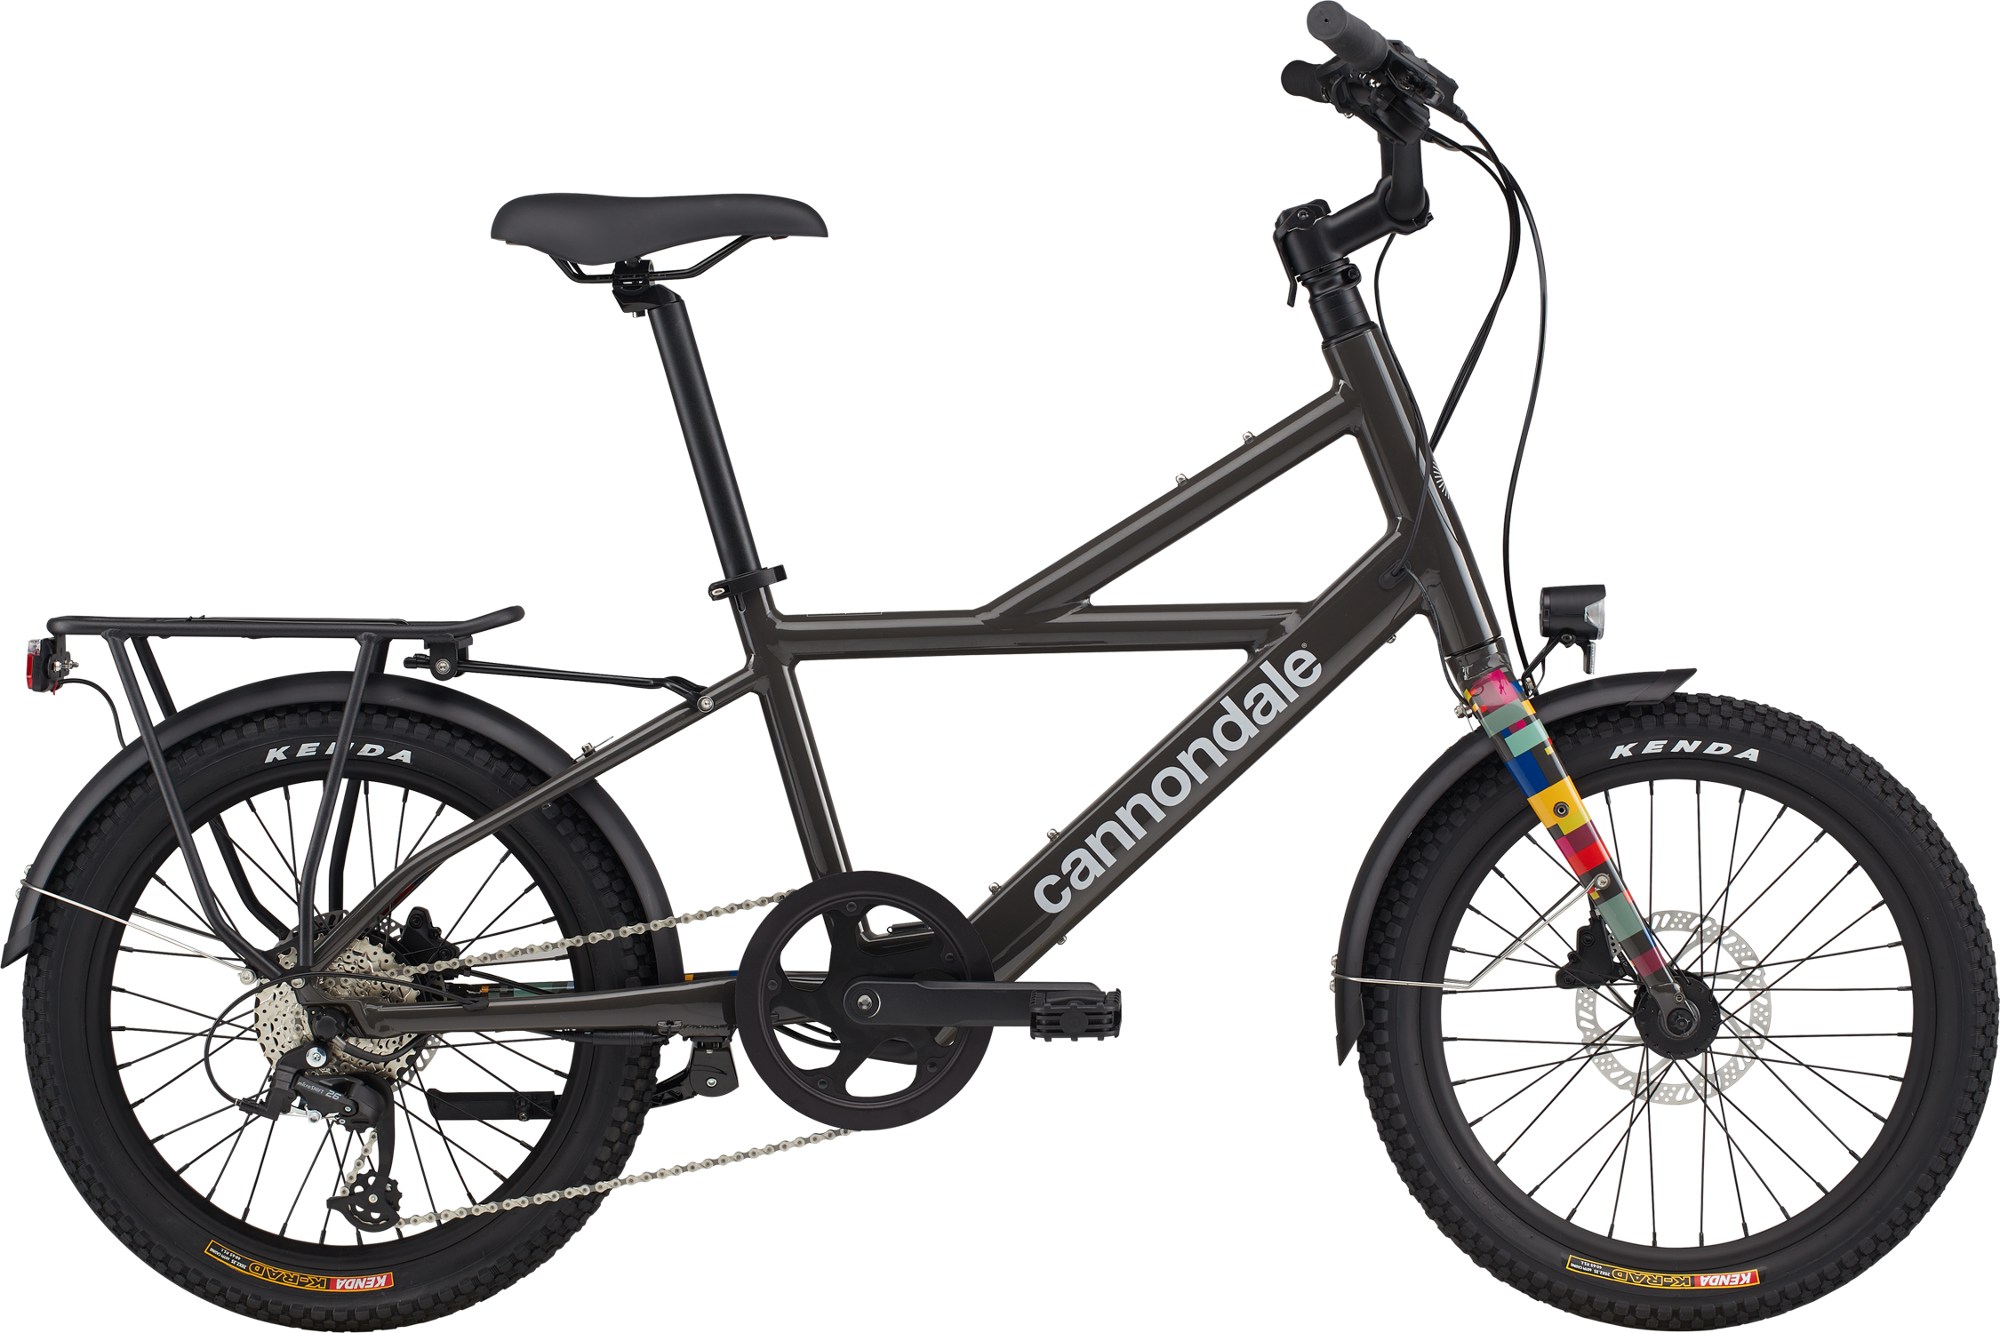
MSRP: $1,900
- Height range: 4’5″ – 6’1″
- Wheel size: 20″
- Motor: Hyena 250W / 250 Wh battery
- Top Speed: 20 mph
- Weight: 39 lb
The Cannondale Compact Neo is an electric bike for teens that justifies its price tag with tons of features, quality, and unique design.
This kids’ electric bicycle allows your teens to join you on tough rides thanks to a 250W Hyena hub-drive motor. This motor makes each pedal stroke enjoyable no matter the gradient and limits your kid to a 20 mph assisted speed for around 30 miles.
The components that make this bike easy to control and comfortable include its hydraulic disc brakes, 2.35″ tires, fenders and rack, and adjustable handlebars.
Additionally, the Cannondale Compact Neo is fitted with lights for safety along with internal cable routing for a stylish look.
The recommended rider height for this e-bike is 4’5″ to 6’1″, so it can be a bike for the entire family—teens and their parents can share it!
3. Rocky Mountain Reaper Powerplay 26

MSRP: $4,899
- Height range: 4’6″ – 5’1″
- Wheel size: 26″
- Motor: Dyname S4 Mini Mountain Bike Drive System / 240 Wh battery
- Top Speed: 20 mph
- Weight: 41.86 lb
The Rocky Mountain Reaper is an electric bike with premium components optimized for kids’ enjoyment on off-road trails.
This versatile kids’ bike comes with 26″ wheels wrapped in 2.4″ tires which boosts stability and rollover ability while also making for more precise and maneuverable handling on trails.
The Dyname S4 Mini Mountain Bike Drive System assists riders up to 20 mph, which is more than enough for young aspiring mountain bikers. The Reaper Powerplay also has a 240 Wh battery that offers an impressive range for long days on the trails.
Finally, this bike also boasts hydraulic disc brakes with motor cutoff for increased safety and a Shimano CUES 10-speed drivetrain for real mountain biking performance.
Unfortunately, the base weight of 41.8 lb makes this bike more difficult to maneuver than other options on this list for the younger end of the age range, though this is still very lightweight for this type of ebike.
4. woom UP 5
MSRP $1,999
- Age range: 7-11 years
- Wheel size: 20″
- Motor: 250W motor / 250 Wh battery
- Top Speed: 12 mph
- Weight: 35.6 lb
Kids’ bike brand woom is the leading producer of premium bikes for children across all ages.
The Woom UP 5 is similar to the UP 6 we’ve already reviewed above, but it’s aimed at slightly shorter and younger riders.
For power, the UP 5 has a premium Fazua Evation mid-drive motor with 55 Nm of torque, providing max assisted speeds of up to 12 mph and tons of range. Additionally, you have an 11-speed SRAM NX drivetrain which helps you get the most from your motor and battery.
This bike uses comfortable and stable off-road geometry and versatile components including 24 x 2.35″ Schwalbe Rocket Ron tires, a 6061 aluminum frame, and Promax hydraulic disc brakes, which give it a great ride quality.
Finally, it’s good to know that all woom bikes are designed with child-specific components and geometry that make riding enjoyable, comfortable, and safe for the listed age range.
5. AVDLBIKE Fat Tire E-Bike for Kids

MSRP: Check on Amazon
- Height range: Under 70 inches
- Wheel size: 16″
- Motor: 500W motor / 460 Wh battery
- Top Speed: 22 mph
- Weight: N/A
The AVLDBike is a motorized bicycle for kids and one of the cheapest high-power choices with great off-road capability. This is a solid option for young kids and preschoolers, as it comes with 16″ wheels and fits riders under 70″ tall.
This kids’ fat tire ebike boasts a 500W motor which provides max speeds of 22 mph for a 45-mile ride in pedal-assist mode.
This model also has wide 16″ tires and dual disc brakes which allow it to perform great off-road or on city streets.
Additionally, the battery is removable, the bike comes with front and rear lights, and there’s also a front suspension fork for improved handling and comfort.
We also love the moped-style design, which makes this kids’ ebike look very cool.
Best Electric Balance Bikes for Kids
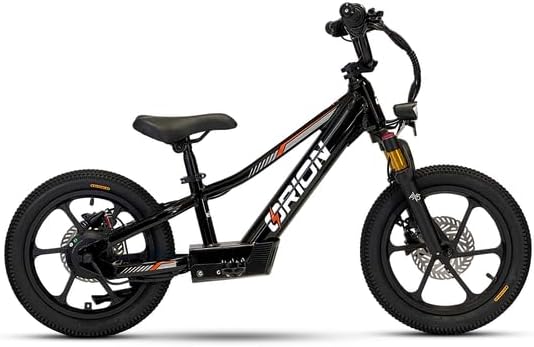
6. Orion Moto e16x
MSRP: Check on Amazon
- Inseam & heigh range: 39–46″ height and 16–20″ inseam
- Wheel size: 16″
- Motor and Battery: 350W motor / 38V 8 Ah battery
- Top Speed: N/A
- Weight: N/A
The Orion Moto electric balance bike for kids has a fun, confidence-building design and an affordable price tag.
This bike has a 350W motor and a 36V 8 Ah battery that lasts for at least an hour and provides plenty of power for young kids learning how to ride. The alloy frame and comfy seat also make it enjoyable to ride.
The Orion balance bike has grippy knobby tires, an easy-to-reach brake lever for the front and rear disc brakes, though the top speed is not disclosed by the manufacturer.
The bike is available with 16″ wheels and suits kids with a 39–46″ height and 16–20″ inseam, which is a pretty wide range.
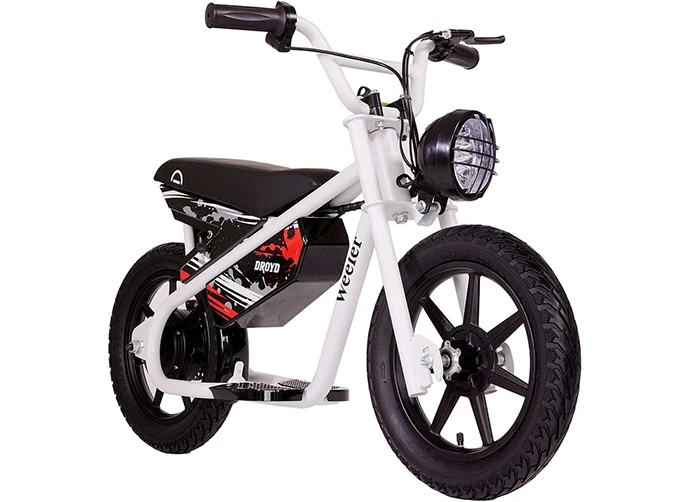
7. Droyd Weeler
MSRP: Check on Amazon
- Age range: 6 years and up
- Wheel size: 14″
- Motor and Battery: 200W motor / 192 Wh battery
- Top Speed: 10 mph
- Weight: 40 lb
The Droyd Weeler kid’s electric balance bike is designed for parents who want to give their kids an exhilarating first biking experience.
This e-bike fits kids aged 6 and up, so it’s not suitable for very young riders. It has a 200W motor that allows children to reach 10 mph so they can practice safely and have fun.
Firstly, kids learn to push the bike and balance while also using the brake. The next step is to add some light power.
The Droyd Weeler balance bike comes with a 192 Wh battery that provides enough range for around 45 minutes of heavy use.
The bike rolls on 14″ wheels, comes with treaded tires, and weighs 40 lb, which is not very lightweight. However, its powerful rear drum brake should have no issues stopping the bike at full speed.
8. Hiboy BK1

MSRP: Check on Amazon
- Age range: 3-5 years
- Wheel size: 12″
- Motor and Battery: 100W motor / 24V battery
- Top Speed: 9 mph
- Weight: 17.6 lb
The Hiboy BK1 is an electric balance bike that gives kids the opportunity to learn cycling fundamentals with the added fun and support an electric motor provides.
This toddler electric bike provides a comfortable riding experience for young children due to its ergonomic design including a low seat height and a comfortable saddle.
The 100W motor on the BK1 has two settings and a max speed of 9 mph which allows enough speed to have fun while staying safe.
Moreover, the 30-50-minute ride time or 6.2 miles of range leaves plenty of room to practice. The bike weighs just 17.6 lb, which makes it ideal for younger kids who would struggle to maneuver a heavier bike.
9. Wonzeal Kids’ Electric Bike

MSRP: Check on Amazon
- Age range: 2–7 years
- Wheel size: 12″
- Motor and Battery: 150W motor / 90 minutes ride time
- Top Speed: 4–11 mph
- Weight: 16 lb
The Wonzeal is another kids’ electric balance bike with chunky tires that offer tons of grip and stability.
This e-bike is ideal for kids aged 2 to 7. The 150W rear hub motor packs a strong punch and its top speed can be set at 4 mph, 8 mph, or 11 mph.
The frame-mounted battery can last up to 90 minutes, which is not that great, but enough for one long and fun riding session.
The Wonzeal is also quite comfortable thanks to the wider tires on 12″ wheels. In addition, the seat adjusts between 15.3 and 17.7″ so your kids can keep riding as they grow.
Finally, an easy-to-reach brake lever powers an electric brake to provide plenty of stopping power, which is necessary due to the 11 mph top speed.
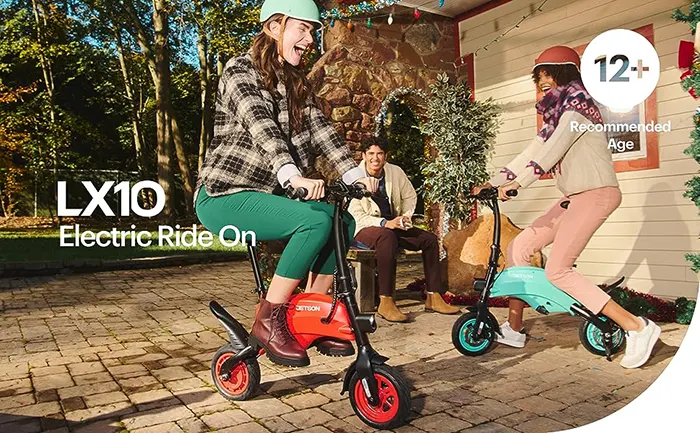
10. Jetson LX10
MSRP: Check on Amazon
- Age range: 12+ years
- Wheel size: 10″
- Motor: 250W motor
- Top Speed: 15.5 mph
- Weight: 36 lb
The Jetson LX10 balance electric bike is a cheap option ideal for teens aged 12 years and over.
This is not a true balance bike, but it doesn’t come with pedals and a drivetrain, so you can only power it by using the motor and the throttle.
The bike has a speed limit of 15.5 mph which when reached automatically shuts off the motor. The motor itself provides 250W of power and offers a nice kick that allows your kid to easily take on steep inclines.
This bike also folds down for easier storage and transportation, which is a big plus if you live in an apartment building.
Finally, Jetson developed this bike with integrated lights and dual disc brakes to keep your kid safe while riding at night or descending.
11. Stacyc 16eDrive Kids Electric Balance Bike

MSRP: Check on Amazon
- Age range: 5-7 years
- Wheel size: 16″
- Motor: 20V motor / 4 Ah battery
- Top Speed: 5-13 mph
- Weight: 20 lb
The Stacyc 16eDrive children’s electric bike opens up opportunities for children to enjoy learning how to ride.
Using a 20V 4Ah battery, your kid can expect to practice with power for between 30 and 60 minutes. Moreover, quick charging allows batteries to be fully charged in just 30-60 minutes, so your children can be back in the saddle in no time.
Additionally, there are three power modes and a safe assisted max speed of 5-13 mph. A lightweight frame and a low 20-pound total weight ensure the bike is fun to use even without the motor.
This electric bike for young kids uses a twist throttle, 16″ pneumatic tires, and a powerful rear drum brake to ensure a safe and fun time while learning and riding.
12. Gotrax Electric Balance Bike

MSRP: Check Price on Amazon
- Age range: 4-7 years
- Wheel size: 14″
- Motor: 250W motor / 187 Wh battery
- Top Speed: 12 mph
- Weight: 27 lb
Kids’ electric bikes like the Gotrax balance bike are ideal for parents with limited budgets who want their kids to have the enjoyment of learning to ride with assistance.
A tiny 250W motor offers an 12 mph top speed, allowing 4 to seven-year-olds to learn how to balance in just a few hours.
Similarly, a 187 Wh battery will provide enough juice for up to 15.5 miles of riding, which is plenty for small children.
Operating the Gotrax ebike is easy with just two buttons, one to add power and one to brake. Likewise, the bike weighs just 27 lb, so it will be easy for young kids to manage.
13. AIII Kids’ Electric Bike

MSRP: Check on Amazon
- Age range: 3–6 / 5–12
- Wheel size: 12″ or 16″
- Motor: 170W or 340W motor / 125 Wh battery
- Top Speed: 10/12 mph
- Weight: 25.4 lb
This kids e-bike by AIII is a great low-power entry-level bicycle for teens and young kids to get the most out of cycling.
This AIII bike comes in two versions, with 12″ or 16″ wheels. It has a moderately powerful 170W or 340W motor with several levels of assistance and a max speed of 10 or 12 mph, which is more than enough to keep up with the parents on family riders.
The motor is powered by a 24V 5.2Ah battery that lasts for 40–70 minutes of riding with moderate use, depending on the weight of the child, the terrain, and the weather.
Moreover, this kids ebike has comfortable touchpoints, upright riding geometry, a fun paint job, a comfy saddle, and grippy tires.
So, the AIII kids’ ebike has everything you and your teen need to have fun while cycling, commuting, and exploring the neighborhood.
Frequently Asked Questions
Do bike companies make e-bikes for kids?
At what age can you ride an electric bike?
In the USA, there are 10 states that limit the minimum age requirement for e-biking. These are:
Hawaii – 18
Massachusetts – 16
North Carolina – 16
Oregon – 16
Pennsylvania – 16
Washington D.C. – 16
Minnesota – 15
New Mexico – 15
South Carolina – 15
Alaska – 14
The rest of the States have no legal minimum age requirement for riding an e-bike.
Can a 12-year-old ride an electric bike?
Should I get an electric bike for children?
How to choose an electric bike for kids?
Choosing a kids’ bike involves three main questions:
What type of riding are you going to be doing?
What is your budget?
How old is your child?
When you figure this out you can choose the style of bike, the size, and the level of components you can afford. When deciding what to buy, look for something that is lightweight and has child-specific components that are easy to adjust. For the most part, an average battery and motor combination should work great.
Share this on: